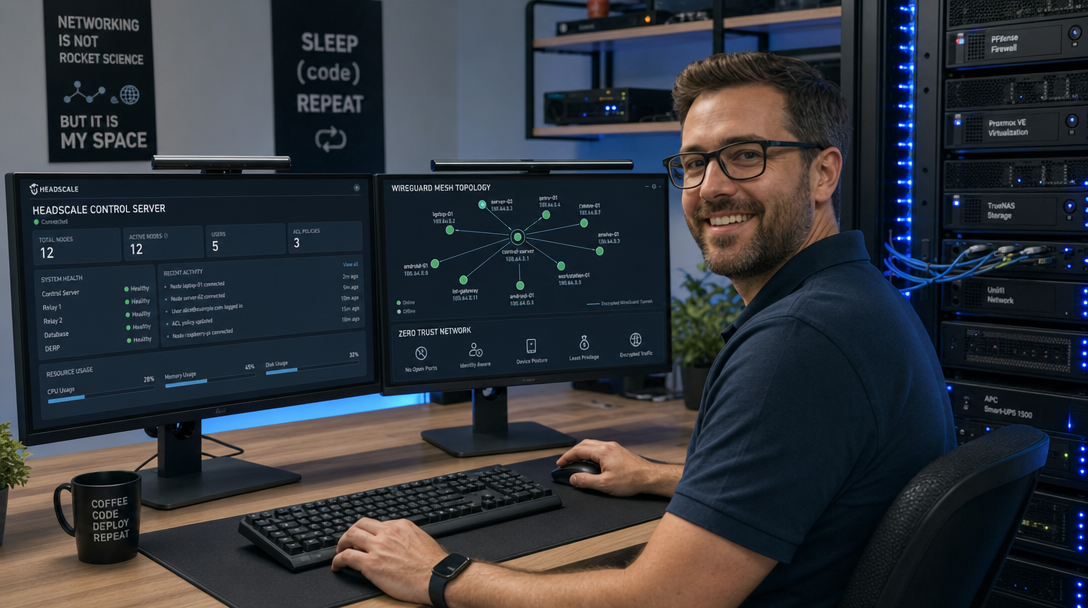
Tailscale transformed peer-to-peer networking by pairing the blazing speed and cryptographic simplicity of WireGuard with centralized coordination and automatic NAT traversal. However, in enterprise environments and privacy-conscious homelabs, relying on an external proprietary coordination plane poses compliance hurdles, device-count limitations, and data custody risks. Headscale solves this dilemma by providing an open-source, self-hosted implementation of the Tailscale control server, granting you 100% data sovereignty over your zero-trust overlay mesh network.
Why Self-Host Headscale?
WireGuard by itself is an unbrokered transport protocol: every peer must know the public keys and endpoint IP addresses of every other peer it communicates with. On a dynamic fleet of laptops, cloud VPS instances, mobile devices, and home servers, manually updating WireGuard configurations becomes unmanageable. The Tailscale architecture introduces an orchestration plane that dynamically distributes routing tables, public keys, and cryptographic ACLs across authenticated nodes.
While Tailscale’s commercial control plane is convenient, self-hosting Headscale delivers critical operational advantages:
- Zero Device Restrictions: Add unlimited nodes, users, and routing gateways without hitting tier limits or paywalls.
- Air-Gapped and Sovereign Metadata: Device hostnames, internal IP allocations (Carrier-Grade NAT 100.64.0.0/10), and connection timestamps remain solely on your server.
- Native Client Compatibility: Official Tailscale clients on Linux, macOS, Windows, iOS, and Android seamlessly connect to Headscale using the
--login-serverflag. - Full Control over ACLs & MagicDNS: Define granular firewall rules, user namespaces, and deterministic split-DNS resolution tailored to your homelab domains.
Architecture and Traffic Flow
It is crucial to understand that Headscale never handles your payload traffic. Nodes only contact the Headscale control server over HTTPS/gRPC to announce their current endpoints, fetch public keys of peers, and receive updated Access Control Lists (ACLs). Once peers exchange keys, all application traffic flows directly peer-to-peer via encrypted WireGuard tunnels.
+-------------------------------------------------------------------------+
|                         Public Internet / WAN                           |
+-------------------------------------------------------------------------+
                                    |
                                    v (Ports 80/443 TCP, 3478 UDP)
                    +-------------------------------+
                    |       Caddy Reverse Proxy     |
                    | (Automated Let's Encrypt TLS) |
                    +-------------------------------+
                                    |
                                    v (Internal Docker Network)
                    +-------------------------------+
                    |    Headscale Control Plane    |
                    | (gRPC / HTTP API / SQLite DB) |
                    +-------------------------------+
                                    :
           Control Signaling Only   : (Keys, Routes & MagicDNS)
           ..........................
          .                         .
          v                         v
+-------------------+     Direct Peer-to-Peer     +-------------------+
|  Workstation Node | <=========================> |  Production Node  |
|  (Linux / macOS)  |      WireGuard Mesh Tunnel  |    (Cloud VPS)    |
+-------------------+     (Encrypted Data Plane)  +-------------------+
          \                                                 /
           \.............................................../
                      DERP Fallback Relay (If Strict NAT)
If two peers sit behind symmetrical corporate NATs that prevent direct UDP punching, traffic seamlessly falls back to Tailscale DERP (Designated Encrypted Relay for Packets) relays without breaking connections.
Prerequisites
- A Linux server (Debian 12, Ubuntu 24.04/26.04 LTS, or Rocky Linux) with a public IPv4 address.
- Docker Engine (v26+) and Docker Compose (v2.24+) installed.
- A fully qualified domain name (FQDN), e.g.,
headscale.example.com, with anArecord pointing to your server’s public IP. - Open firewall ports: TCP
80, TCP443, and UDP3478(STUN for DERP relaying).
Step 1: Directory Structure and Environment Setup
Create a dedicated directory on your server to house Headscale configurations, runtime databases, socket files, and Caddy proxy definitions:
sudo mkdir -p /opt/headscale/config /opt/headscale/data /opt/headscale/caddy
cd /opt/headscale
sudo touch /opt/headscale/data/db.sqlite
sudo chmod 750 /opt/headscale/data
Step 2: Headscale Configuration (config.yaml)
Create the core configuration file at /opt/headscale/config/config.yaml. Replace headscale.example.com with your actual public domain name.
---
server_url: https://headscale.example.com
listen_addr: 0.0.0.0:8080
metrics_listen_addr: 127.0.0.1:9090

grpc_listen_addr: 0.0.0.0:50443
grpc_allow_insecure: false

private_key_path: /var/lib/headscale/private.key
noise:
  private_key_path: /var/lib/headscale/noise_private.key

ip_prefixes:
  - 100.64.0.0/10
  - fd7a:115c:a1e0::/48

derp:
  server:
    enabled: true
    region_id: 999
    region_code: "headscale-derp"
    region_name: "Headscale Embedded DERP"
    stun_listen_addr: "0.0.0.0:3478"
  urls:
    - https://controlplane.tailscale.com/derp-map/default
  auto_update_enabled: true
  update_frequency: 24h

disable_check_updates: true
ephemeral_node_inactivity_timeout: 30m

database:
  type: sqlite
  sqlite:
    path: /var/lib/headscale/db.sqlite

dns:
  magic_dns: true
  base_domain: mesh.internal
  nameservers:
    split: {}
    global:
      - 1.1.1.1
      - 9.9.9.9

log:
  format: text
  level: info

policy:
  mode: file
  path: /etc/headscale/acl.hujson
Step 3: Access Control Lists (acl.hujson)
Headscale uses Tailscale-compliant HuJSON (JSON with comments) to enforce zero-trust network segregation. Create /opt/headscale/config/acl.hujson to define default administrative groups, tag ownership, and peer visibility:
{
  "groups": {
    "group:admins": ["admin@mesh.internal"]
  },
  "tagOwners": {
    "tag:server": ["group:admins"],
    "tag:homelab": ["group:admins"]
  },
  "acls": [
    // Admins can connect to all machines on any port
    {
      "action": "accept",
      "src": ["group:admins"],
      "dst": ["*:*"]
    },
    // General homelab machines can only communicate amongst each other
    {
      "action": "accept",
      "src": ["tag:homelab"],
      "dst": ["tag:homelab:*"]
    }
  ]
}
Step 4: Caddy Reverse Proxy & Docker Compose
To proxy WebSocket signaling, long-polling HTTP connections, and gRPC traffic with automated TLS certificate provisioning, Caddy is the ideal lightweight reverse proxy. Create /opt/headscale/caddy/Caddyfile:
headscale.example.com {
    reverse_proxy headscale:8080 {
        header_up X-Forwarded-For {remote_host}
        header_up X-Real-IP {remote_host}
    }

    log {
        output file /var/log/caddy/headscale_access.log
        format console
    }
}
Now assemble both services into /opt/headscale/docker-compose.yml:
services:
  headscale:
    image: headscale/headscale:0.24.1
    container_name: headscale
    restart: unless-stopped
    command: headscale serve
    volumes:
      - ./config:/etc/headscale:ro
      - ./data:/var/lib/headscale
    ports:
      - "3478:3478/udp" # Embedded STUN/DERP listener
    environment:
      - TZ=UTC
    networks:
      - mesh_net

  caddy:
    image: caddy:2.8-alpine
    container_name: headscale_proxy
    restart: unless-stopped
    ports:
      - "80:80"
      - "443:443"
    volumes:
      - ./caddy/Caddyfile:/etc/caddy/Caddyfile:ro
      - ./caddy/data:/data
      - ./caddy/config:/config
      - ./caddy/logs:/var/log/caddy
    networks:
      - mesh_net
    depends_on:
      - headscale

networks:
  mesh_net:
    name: headscale_network
    driver: bridge
Launch the stack in detached mode and inspect logs to verify clean startup:
docker compose up -d
docker compose logs -f headscale
Step 5: User Namespaces and Pre-Auth Keys
Before any client can connect, create a user namespace on the Headscale control server using the CLI inside the container:
# Create primary user namespace
docker exec -it headscale headscale users create homelab

# List users to verify
docker exec -it headscale headscale users list
For automated server provisioning or unattended headless devices, generate a reusable, tag-enabled pre-authentication key with a 90-day expiry:
docker exec -it headscale headscale preauthkeys create \
  --user homelab \
  --reusable \
  --expiration 2160h \
  --tags tag:server
The command returns a 48-character secret token (e.g., 9e8f4b1a2c3d...). Store this token securely.
Step 6: Connecting Clients to Your Private Mesh
Linux Client (CLI)
Install the standard Tailscale client on your target Linux machine via the official repository, then register against your private control plane:
curl -fsSL https://tailscale.com/install.sh | sh

# Connect using Pre-Auth Key
sudo tailscale up \
  --login-server https://headscale.example.com \
  --auth-key YOUR_PREAUTH_KEY_HERE \
  --accept-dns=true
If you prefer interactive authentication without a pre-auth key, run:
sudo tailscale up --login-server https://headscale.example.comThe client prints an activation URL containing a node key (e.g., https://headscale.example.com/register/mkey:123456789...). Run the registration command shown on your Headscale host to approve the node.
macOS and Windows Clients
On macOS or Windows workstations using the official Tailscale GUI:
- Hold the Option key (macOS) or Shift key (Windows) and click the Tailscale menu bar / system tray icon.
- Select Debug > Custom Login Server…
- Enter
https://headscale.example.comand confirm. - Log in through the browser authorization screen prompted by your Headscale instance.
Step 7: Advanced Routing – Subnet Routers & Exit Nodes
A major benefit of Tailscale and Headscale is routing traffic into physical LANs or funneling all internet traffic through a trusted gateway node (Exit Node).
Enabling Subnet Routing on a Gateway Node
On the homelab server that has direct access to your physical LAN (e.g., 192.168.1.0/24), enable IP forwarding and advertise the subnet:
# Enable IPv4 forwarding on host
echo 'net.ipv4.ip_forward = 1' | sudo tee -a /etc/sysctl.d/99-tailscale.conf
echo 'net.ipv6.conf.all.forwarding = 1' | sudo tee -a /etc/sysctl.d/99-tailscale.conf
sudo sysctl -p /etc/sysctl.d/99-tailscale.conf

# Advertise subnet to Headscale
sudo tailscale up \
  --login-server https://headscale.example.com \
  --advertise-routes=192.168.1.0/24 \
  --accept-routes
By default, Headscale does not automatically trust advertised routes. Enable them on the control server:
# Find the node ID
docker exec -it headscale headscale nodes list

# Approve the advertised subnet route (e.g., node ID 1)
docker exec -it headscale headscale routes enable -r 1 -a 192.168.1.0/24
Any client node configured with tailscale up --accept-routes can now reach 192.168.1.50 directly across the mesh network without requiring WireGuard to be installed on every single peripheral device.
Production Hardening and Best Practices
- Automate SQLite Backups: The SQLite database stores cryptographic peer keys, routes, and namespaces. Set up daily snapshots using
sqlite3 /opt/headscale/data/db.sqlite ".backup '/opt/headscale/data/backup-$(date +%F).sqlite'"and push them offsite. - Strict UFW / Firewall Policies: Lock down host ports. The only external ingress ports should be TCP 80/443 (handled by Caddy) and UDP 3478 (DERP STUN). Exposing port 8080 directly bypasses your TLS proxy.
- Implement Ephemeral Nodes: For ephemeral CI/CD runners or test environments, always generate pre-auth keys with
--ephemeralso decommissioned nodes automatically drop from the routing table. - Enable MagicDNS with Internal Domains: MagicDNS allows accessing servers using simple hostnames (e.g.,
ping truenas.mesh.internal) without managing local hosts files or internal BIND configurations.
Troubleshooting Common Headscale Issues
1. Client Fails to Connect: “Failed to connect to control server”
Cause: TLS certificate handshake failure, HTTP-to-HTTPS redirect misconfiguration, or gRPC stream truncation in the reverse proxy.
Fix: Verify that Caddy has successfully obtained an ACME Let’s Encrypt certificate by checking docker logs headscale_proxy. Test certificate validity using curl -Iv https://headscale.example.com/health. Ensure that server_url in config.yaml specifies the exact https:// scheme and port 443 without trailing slashes.
2. Subnet Routes or Exit Nodes Remain Inactive on Clients
Cause: The route was advertised by the client node but not explicitly approved on the Headscale control server, or Linux kernel IP forwarding is disabled.
Fix: Run docker exec -it headscale headscale routes list. If the route shows Enabled: false, execute headscale routes enable -r <route_id>. On the gateway node, confirm sysctl net.ipv4.ip_forward returns 1 and that iptables or nftables allows forwarding across the tailscale0 interface.
3. MagicDNS Fails to Resolve Peer Names on Linux Nodes
Cause: Conflict between systemd-resolved and Tailscale’s split-DNS manager.
Fix: Check DNS resolution status using resolvectl status tailscale0. Ensure that the Tailscale client was started with tailscale up --accept-dns=true. If running on a minimal distribution without systemd-resolved, install resolvconf or configure Headscale’s base domain directly in /etc/resolv.conf.
Conclusion
Self-hosting Headscale provides the ultimate combination of zero-trust network orchestration and complete infrastructure autonomy. By coupling Headscale with Caddy’s automated certificate lifecycle management in Docker Compose, you eliminate third-party dependencies while retaining the fluid user experience, mobile support, and WireGuard throughput of modern mesh VPNs. Your homelab, cloud instances, and remote workstations can now securely communicate as if they were patched into the same local rack switch—completely private and fully under your control.

Hi, I’m Mark, the author of Clever IT Solutions: Mastering Technology for Success. I am passionate about empowering individuals to navigate the ever-changing world of information technology. With years of experience in the industry, I have honed my skills and knowledge to share with you. At Clever IT Solutions, we are dedicated to teaching you how to tackle any IT challenge, helping you stay ahead in today’s digital world. From troubleshooting common issues to mastering complex technologies, I am here to guide you every step of the way. Join me on this journey as we unlock the secrets to IT success.