Public container registries like Docker Hub or GitHub Packages are suitable for public open-source software, but in regulated enterprise environments and security-conscious homelabs, pushing internal microservices, private proprietary code, and fine-tuned AI model images to external registries introduces significant security and compliance vulnerabilities. Harbor—a graduated Cloud Native Computing Foundation (CNCF) project—is the gold standard for private OCI-compliant container registries. By integrating automated vulnerability scanning with Trivy, cryptographic image signing with Cosign, and granular Role-Based Access Control (RBAC), Harbor transforms a basic Docker storage endpoint into an enterprise-grade software supply chain fortress.
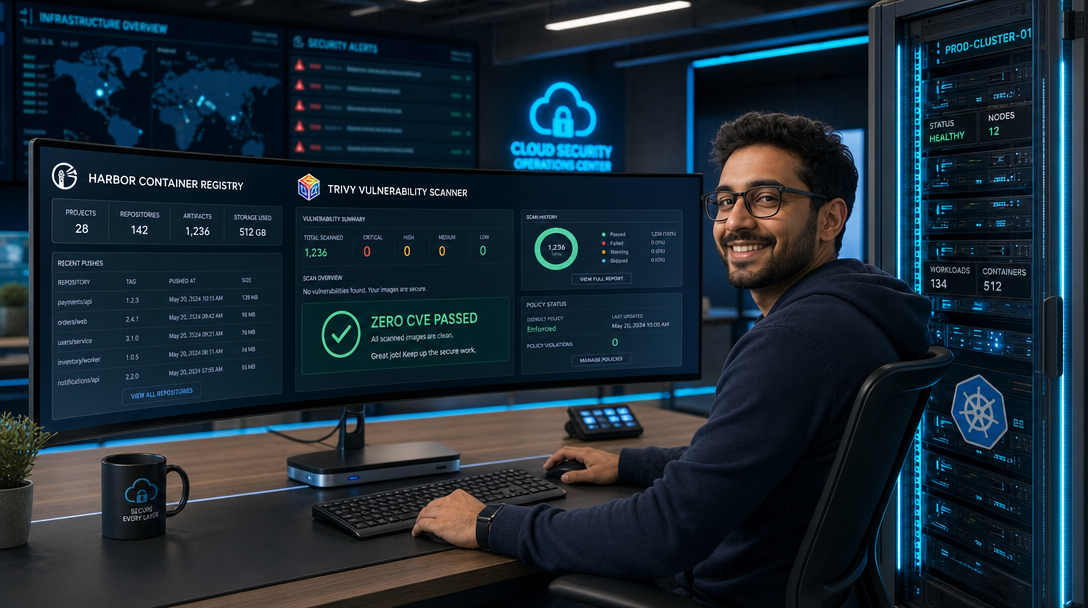
Why Harbor Over Standard Docker Registry?
The standard open-source distribution/distribution (Docker Registry v2) engine provides bare-metal blob and manifest storage, but lacks an administrative UI, security enforcement mechanisms, and access governance. Harbor wraps the registry engine with essential security layers:
- Automated Vulnerability Scanning: Native integration with Aqua Security’s Trivy scanner automatically inspects every pushed layer for known Common Vulnerabilities and Exposures (CVEs) across OS packages and application dependencies.
- Deployment Gatekeeping: Enforce security policies that block client Docker daemons or Kubernetes kubelets from pulling images with Critical or High CVEs.
- Cryptographic Content Trust: Verify software supply chain integrity using Cosign or Notation, preventing tampered container layers from entering production clusters.
- Multi-Tenancy & Robot Accounts: Isolate projects by team or environment with fine-grained RBAC, OIDC/LDAP single sign-on, and scoped robot tokens for automated CI/CD pipelines.
- Automated Garbage Collection: Prune untagged, dangling manifests and reclaim valuable physical disk space without taking the registry offline.
Architecture and Security Interception Flow
Harbor operates as an orchestrated microservices ecosystem managed by Docker Compose. When a developer or CI/CD runner pushes an image, requests flow through multiple security validations before blobs are persisted:
+-------------------------------------------------------------------------+
|                    CI/CD Runner / Developer Workstation                 |
+-------------------------------------------------------------------------+
                                    |
                                    v (docker push / HTTPS 443)
                    +-------------------------------+
                    |       Harbor Nginx Proxy      |
                    | (TLS Termination & Routing)   |
                    +-------------------------------+
                                    |
          +-------------------------+-------------------------+
          |                                                   |
          v                                                   v
+-------------------+                               +-------------------+
|    Harbor Core    |                               |    Registry V2    |
| (Auth, RBAC, API) |                               | (OCI Blob Storage)|
+-------------------+                               +-------------------+
          |                                                   |
          v (Webhook Trigger on Push)                         |
+-------------------+                                         |
|    Jobservice     |                                         |
+-------------------+                                         |
          |                                                   |
          v (Async Scan Task)                                 v
+-------------------+                               +-------------------+
|   Trivy Scanner   | ============================> | Storage Backend   |
| (CVE DB Offline)  |     Inspects Layer Blobs      | (Local FS / S3)   |
+-------------------+                               +-------------------+
Prerequisites
- A 64-bit Linux host (Ubuntu 24.04/26.04 LTS, Debian 12, or RHEL 9).
- At least 4 CPU cores, 8 GB RAM (16 GB recommended for concurrent Trivy scanning), and 100 GB+ disk storage.
- Docker Engine 26+ and Docker Compose v2.24+ installed.
- A fully qualified domain name (e.g.,
registry.example.com) with anArecord pointing to your server’s public IP address. - Valid TLS certificates (Let’s Encrypt or an internal enterprise PKI CA certificate).
Step 1: System Preparation and Firewall Configuration
Ensure your server firewall allows incoming connections on standard web and TLS ports:
sudo ufw allow 80/tcp comment "HTTP for ACME challenge / Redirect"
sudo ufw allow 443/tcp comment "HTTPS Harbor Registry"
sudo ufw reload
Create a dedicated directory to store Harbor installation scripts, persistent configuration templates, and data volumes:
sudo mkdir -p /opt/harbor /data/cert /data/harbor
cd /opt/harbor
Step 2: TLS Certificate Provisioning
Because Docker daemons reject unencrypted registries by default, running Harbor over TLS with a trusted certificate is mandatory. If you have Certbot installed on the host, issue a Let’s Encrypt certificate:
sudo certbot certonly --standalone \
  -d registry.example.com \
  --preferred-challenges http \
  --agree-tos -m admin@example.com

# Copy certificates to Harbor's trusted certificate directory
sudo cp /etc/letsencrypt/live/registry.example.com/fullchain.pem /data/cert/registry.example.com.crt
sudo cp /etc/letsencrypt/live/registry.example.com/privkey.pem /data/cert/registry.example.com.key
sudo chmod 600 /data/cert/registry.example.com.key
Step 3: Downloading and Configuring Harbor
Download the official Harbor offline installer archive (which bundles all required container images to ensure consistent, air-gapped deployments):
HARBOR_VERSION="v2.12.0"
curl -sSL "https://github.com/goharbor/harbor/releases/download/${HARBOR_VERSION}/harbor-offline-installer-${HARBOR_VERSION}.tgz" -o harbor-installer.tgz
tar -xvzf harbor-installer.tgz
cd harbor
cp harbor.yml.tmpl harbor.yml
Edit harbor.yml to match your network topology, certificate paths, storage location, and security credentials:
# Configuration for Harbor v2.12+
hostname: registry.example.com

# HTTP configuration (auto-redirects to HTTPS)
http:
  port: 80

# HTTPS configuration
https:
  port: 443
  certificate: /data/cert/registry.example.com.crt
  private_key: /data/cert/registry.example.com.key

# Default Administrator Password
harbor_admin_password: "HarborSecurePassword2026!"

# Internal Database Password
database:
  password: "HarborDBPostgresSecret2026!"
  max_idle_conns: 50
  max_open_conns: 100

# Persistent Data Storage on Host
data_volume: /data/harbor

# Trivy Vulnerability Scanner Integration
trivy:
  ignore_unfixed: false
  skip_update: false
  offline_scan: false
  insecure: false

# Metric endpoint for Prometheus (optional)
metric:
  enabled: true
  port: 9090
  path: /metrics
Step 4: Installing and Launching Harbor with Trivy
Harbor includes an automated code generation script that reads harbor.yml and synthesizes configuration files, Nginx reverse proxy directives, and an optimized docker-compose.yml file:
# Generate compose and microservice configs with Trivy enabled
sudo ./prepare --with-trivy

# Run the installer script
sudo ./install.sh --with-trivy
Verify that all Harbor microservices are running in a healthy state:
docker compose psYou should see nine active services: harbor-portal, harbor-core, harbor-adminserver, registry, registryctl, harbor-db (PostgreSQL), redis, harbor-log, and trivy-adapter.
Step 5: Project Creation & Vulnerability Gatekeeping
Log into the Harbor Web UI by pointing your browser to https://registry.example.com. Enter the default username admin and the password configured in harbor.yml.
Creating a Secure Project
- Click New Project on the dashboard.
- Name the project
production. - Leave Access Level as Private (requires authentication to pull or push).
- Set a storage quota (e.g.,
50 GiB) to prevent uncontrolled disk consumption. - Click OK.
Enforcing Deployment Security Policies
Select your newly created production project and navigate to the Configuration tab:
- Automatically scan images on push: Toggle to Enabled. Trivy will immediately scan any incoming container layer.
- Prevent vulnerable images from running: Toggle to Enabled and set the threshold to High or Critical. Any attempt to
docker pullor deploy an image containing unmitigated High/Critical vulnerabilities will be rejected with an HTTP 412 Precondition Failed response. - Enable Content Trust: (Optional) Require images to be cryptographically signed before allowing pulls.
Step 6: Pushing, Scanning, and Signing Container Images
Authenticating via Docker CLI
On any developer machine or build server, log into your private Harbor registry:
docker login registry.example.com
# Username: admin
# Password: HarborSecurePassword2026!
Building, Tagging, and Pushing an Image
Tag an image to match the Harbor registry format <hostname>/<project>/<repository>:<tag> and push it:
# Tag local build
docker tag nginx:alpine registry.example.com/production/web-server:1.0.0

# Push to Harbor
docker push registry.example.com/production/web-server:1.0.0
Switch back to the Harbor Web UI, navigate to Projects > production > Repositories > web-server. Under the Artifacts list, you will see the artifact with its vulnerability status updating in real-time as Trivy scans the package manifests.
Signing Images with Cosign
To verify the provenance of your container artifacts, sign the digest using Sigstore’s Cosign:
# Generate a cryptographic key pair
cosign generate-key-pair

# Sign the container artifact using its digest
IMAGE_DIGEST=$(docker inspect --format='{{index .RepoDigests 0}}' registry.example.com/production/web-server:1.0.0)
cosign sign --key cosign.key "${IMAGE_DIGEST}"
Harbor natively recognizes Cosign signatures, displaying a verification badge next to the artifact digest in the web console.
Step 7: Automated Storage Garbage Collection
When you delete tags or overwrite artifacts in a container registry, the underlying OCI layers (blobs) remain on physical storage to avoid breaking concurrent builds. Harbor features a zero-downtime Garbage Collection (GC) scheduler to purge orphaned blobs:
- In the Harbor navigation bar, click Administration > Clean Up > Garbage Collection.
- Click GC Now to run an immediate cleanup.
- Select Dry Run first to inspect how many megabytes of unreferenced blobs will be deleted.
- Uncheck dry run and click Save to execute the purge.
- Set up an automated schedule (e.g.,
Custom Cron: 0 0 3 * * 0for every Sunday at 3:00 AM) to maintain pristine storage hygiene.
Production Hardening and Operational Best Practices
- Use Scoped Robot Accounts for CI/CD: Never embed your primary
admincredentials in GitHub Actions, GitLab CI, or Jenkins. Go to Administration > Robot Accounts, generate a token restricted only topushpermissions on theproductionproject, and rotate it every 90 days. - Automate Trivy Vulnerability Database Updates: Trivy automatically downloads fresh CVE feeds from GitHub. If your Harbor instance resides in an air-gapped subnet without direct internet access, configure an internal HTTP proxy in
harbor.ymlor sync the Trivy database offline via scheduled tarballs. - Externalize Database and Object Storage for High Availability: For multi-node high-availability clusters, configure Harbor to store image blobs in an external S3-compatible bucket (such as MinIO or AWS S3) and point metadata to an external managed PostgreSQL cluster.
- Implement Image Retention Rules: In Projects > production > Tag Retention, configure rules such as “Retain the most recent 10 tags matching release-*” to prevent automated CI builds from filling up storage indefinitely.
Troubleshooting Common Harbor Deployments
1. Docker Error: “http: server gave HTTP response to HTTPS client”
Cause: The client Docker daemon is trying to communicate over plain HTTP, or your server’s Nginx configuration failed to bind port 443 with valid certificates.
Fix: Confirm that port 443 is open and listening using netstat -tlpn | grep 443. Verify certificate paths in harbor.yml. If using a self-signed internal CA certificate, copy your CA root cert to the client machine at /etc/docker/certs.d/registry.example.com/ca.crt and restart the Docker daemon using sudo systemctl restart docker.
2. Trivy Scanner Shows Error: “failed to download vulnerability DB”
Cause: Egress DNS resolution failure inside the trivy-adapter container or GitHub API rate limits during database initialization.
Fix: Check adapter logs via docker compose logs trivy-adapter --tail 100. Ensure Docker daemon containers can resolve external DNS. If rate-limited, supply a GitHub token in the Trivy environment configuration or trigger a manual scan update from Administration > Interrogation Services in the web portal.
3. Registry Enters Read-Only Mode Unexpectedly
Cause: The host filesystem partition hosting /data/harbor has exceeded Harbor’s disk threshold (typically 95% capacity), or an administrator left the registry in Maintenance/Read-Only mode following a backup.
Fix: Check disk utilization with df -h /data/harbor. Log in as an administrator, navigate to Administration > Configuration > System Settings, and verify that Read-only mode is unchecked. Execute a Garbage Collection run to reclaim space before resuming push operations.
Conclusion
Deploying Harbor with Docker Compose gives engineering teams complete control over container artifact lifecycles, security scanning, and distribution performance. By enforcing automated Trivy CVE evaluations, role-based robot credentials, and cryptographic signing at the registry level, you eliminate blind spots in your deployment pipeline. Container images moving into your Kubernetes clusters or production Docker hosts are guaranteed to be pristine, scanned, and fully verified—right from your private, sovereign infrastructure.

Hi, I’m Mark, the author of Clever IT Solutions: Mastering Technology for Success. I am passionate about empowering individuals to navigate the ever-changing world of information technology. With years of experience in the industry, I have honed my skills and knowledge to share with you. At Clever IT Solutions, we are dedicated to teaching you how to tackle any IT challenge, helping you stay ahead in today’s digital world. From troubleshooting common issues to mastering complex technologies, I am here to guide you every step of the way. Join me on this journey as we unlock the secrets to IT success.