Domain Name System (DNS) resolution is the fundamental backbone of any digital environment. In modern homelabs, home offices, and enterprise networks, administrators routinely deploy local DNS sinkholes like AdGuard Home or Pi-hole to strip telemetry, block malicious domains, filter intrusive advertisements, and resolve private split-horizon domain names for internal services. However, running a single DNS server introduces an intolerable Single Point of Failure (SPOF). If that single host reboots for a kernel patch, crashes, or suffers a power blip, every client on your network instantly loses internet connectivity.
A common misconception is that entering two DNS IP addresses into your DHCP router settings provides seamless redundancy. In reality, client operating systems (including Windows, macOS, Android, and iOS) do not treat primary and secondary DNS servers as an active/standby pair. Instead, they query both servers concurrently or route queries non-deterministically. If your secondary server is a fallback public DNS (such as 1.1.1.1 or 8.8.8.8), ads and telemetry will constantly leak through. If both entries point to un-synchronized local instances, maintaining custom DNS rewrites and client allowlists across two separate web consoles quickly becomes a maintenance nightmare.
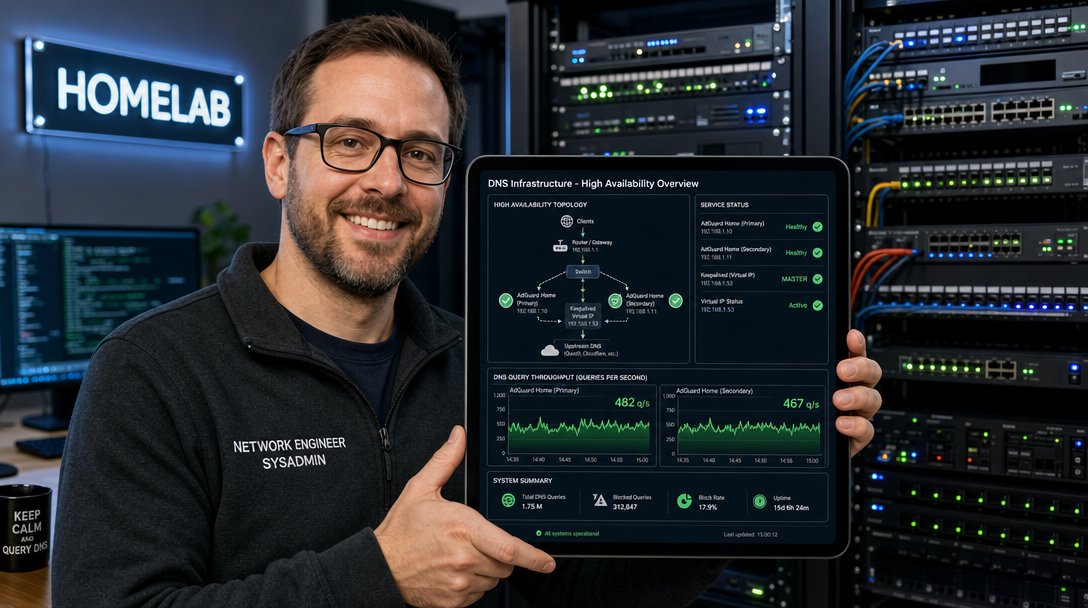
The definitive engineering solution is High-Availability (HA) Dual AdGuard Home orchestrated with Keepalived and AdGuardHome-Sync. In this comprehensive guide, you will learn how to deploy two redundant AdGuard Home nodes across separate Docker hosts, bind them to a single floating Virtual IP (VIP) using VRRP (Virtual Router Redundancy Protocol), and automate real-time two-way configuration synchronization.
Architecture: VRRP Failover & Automated Config Sync
Our architecture utilizes two physical or virtual Linux nodes: Node 1 (Primary) and Node 2 (Secondary). Each node runs AdGuard Home in a Docker container using host networking for zero-overhead Layer 4 DNS throughput. Keepalived manages a floating Virtual IP (e.g., 192.168.1.5). All network clients receive only this single Virtual IP via DHCP.
+-----------------------------------------------------------------------+
|  Local Area Network Clients (Workstations, Phones, Smart Devices)     |
|  Configured DHCP DNS: 192.168.1.5 (Floating Virtual IP)               |
+-----------------------------------+-----------------------------------+
                                    |
                    VRRP Virtual IP: 192.168.1.5
                                    |
            +-----------------------+-----------------------+
            |                                               |
+-----------v-----------------------+   +-------------------v-----------+
|  Node 1: Primary (192.168.1.10)   |   |  Node 2: Backup (192.168.1.11) |
|                                   |   |                               |
|   +---------------------------+   |   |   +-----------------------+   |
|   | Keepalived (MASTER)       |   |   |   | Keepalived (BACKUP)   |   |
|   | Priority: 101             |   |   |   | Priority: 100         |   |
|   | Healthcheck: port 53 DNS  |   |   |   | Healthcheck: port 53  |   |
|   | Holds VIP: 192.168.1.5    |   |   |   | Standby Mode          |   |
|   +-------------+-------------+   |   |   +-----------+-----------+   |
|                 |                 |   |               |               |
|   +-------------v-------------+   |   |   +-----------v-----------+   |
|   | AdGuard Home (Docker)     |   |   |   | AdGuard Home (Docker) |   |
|   | Port 53 / WebUI: 3000     |   |   |   | Port 53 / WebUI: 3000 |   |
|   +-------------^-------------+   |   |   +-----------^-----------+   |
+-----------------|-----------------+   +---------------|---------------+
                  |                                     |
                  +========= AdGuardHome-Sync ==========+
                             (Runs in Docker)
                    Syncs: Rewrites, Filters, Clients,
                     Upstream DNS, and Blocklists
If Node 1’s hardware fails or its AdGuard container crashes, Keepalived’s internal health check detects the failure within 2 seconds. The Virtual IP immediately migrates to Node 2 with zero manual intervention and zero dropped connections.
Prerequisites & Network Planning
Plan your IP allocation before editing configuration files. Example topology:
- Router Gateway:
192.168.1.1 - Virtual Floating IP (VIP):
192.168.1.5(Unassigned IP in your subnet outside the DHCP pool) - Primary Host (Node 1):
192.168.1.10(Mini PC, server, or Proxmox VM) - Secondary Host (Node 2):
192.168.1.11(Second server, Raspberry Pi, or separate VM) - Subnet Mask:
/24(255.255.255.0) - Network Interface:
eth0(Verify on your host usingip -br link)
Step 1: Resolve Port 53 Conflicts (systemd-resolved)
Modern Ubuntu and Debian distributions run systemd-resolved by default, binding a local DNS stub listener to 127.0.0.53:53. This blocks AdGuard Home from binding to port 53. Execute this step on both Node 1 and Node 2:
# Edit the systemd-resolved configuration
sudo mkdir -p /etc/systemd/resolved.conf.d/
sudo tee /etc/systemd/resolved.conf.d/adguard.conf <<'EOF'
[Resolve]
DNS=127.0.0.1
DNSStubListener=no
EOF

# Update symlink for resolv.conf to point to static configuration
sudo rm -f /etc/resolv.conf
sudo ln -s /run/systemd/resolve/resolv.conf /etc/resolv.conf

# Restart systemd-resolved
sudo systemctl restart systemd-resolved

# Confirm port 53 is completely free
sudo ss -tulpn | grep :53
Step 2: Deploy AdGuard Home in Docker Compose
On both Node 1 and Node 2, create the base deployment directory:
sudo mkdir -p /opt/adguard-ha/{adguard_work,adguard_conf} && cd /opt/adguard-haCreate the docker-compose.yml file. We use network_mode: host to bypass Docker’s userland proxy overhead and ensure that client source IP addresses are preserved accurately in AdGuard’s query logs:
# /opt/adguard-ha/docker-compose.yml
services:
  adguardhome:
    image: adguard/adguardhome:latest
    container_name: adguardhome
    restart: unless-stopped
    network_mode: host
    volumes:
      - ./adguard_work:/opt/adguardhome/work
      - ./adguard_conf:/opt/adguardhome/conf
    environment:
      - TZ=UTC
Start AdGuard Home on both nodes:
docker compose up -dComplete the initial wizard on both nodes by opening http://192.168.1.10:3000 and http://192.168.1.11:3000. Bind the DNS server to all interfaces on port 53 and set the administrative Web interface port to 8080 (or 3000). Create an identical administrator username and password (e.g., adguardadmin) on both instances.
Step 3: Configure Keepalived for Virtual IP Failover
Install Keepalived directly on the host operating system of both nodes. While running Keepalived in Docker is possible, running it on the host ensures direct kernel netlink interaction, resilient ARP handling, and seamless failover even if the Docker daemon restarts:
sudo apt-get update && sudo apt-get install -y keepalived curlConfiguration on Node 1 (MASTER)
Create /etc/keepalived/keepalived.conf on Node 1 (192.168.1.10). Replace eth0 with your actual network interface name:
# /etc/keepalived/keepalived.conf (Node 1 - MASTER)
global_defs {
    router_id adguard_node1
    enable_script_security
    script_user root
}

vrrp_script check_dns {
    script "/usr/bin/curl -s -o /dev/null -m 2 http://127.0.0.1:3000/control/status || exit 1"
    interval 2
    weight 4
    fall 2
    rise 2
}

vrrp_instance VI_ADGUARD {
    state MASTER
    interface eth0
    virtual_router_id 51
    priority 101
    advert_int 1

    authentication {
        auth_type PASS
        auth_pass Secr3tVrrpP@ss!
    }

    virtual_ipaddress {
        192.168.1.5/24 dev eth0
    }

    track_script {
        check_dns
    }
}
Configuration on Node 2 (BACKUP)
Create /etc/keepalived/keepalived.conf on Node 2 (192.168.1.11):
# /etc/keepalived/keepalived.conf (Node 2 - BACKUP)
global_defs {
    router_id adguard_node2
    enable_script_security
    script_user root
}

vrrp_script check_dns {
    script "/usr/bin/curl -s -o /dev/null -m 2 http://127.0.0.1:3000/control/status || exit 1"
    interval 2
    weight 4
    fall 2
    rise 2
}

vrrp_instance VI_ADGUARD {
    state BACKUP
    interface eth0
    virtual_router_id 51
    priority 100
    advert_int 1

    authentication {
        auth_type PASS
        auth_pass Secr3tVrrpP@ss!
    }

    virtual_ipaddress {
        192.168.1.5/24 dev eth0
    }

    track_script {
        check_dns
    }
}
Enable and start the Keepalived service on both machines:
sudo systemctl enable --now keepalivedVerify that Node 1 currently holds the Virtual IP:
# On Node 1:
ip addr show eth0 | grep 192.168.1.5
Step 4: Synchronizing Configuration with AdGuardHome-Sync
With failover active, any change made on the primary node (such as adding a DNS rewrite for nas.local or blacklisting a telemetry domain) must automatically replicate to the secondary node. We deploy adguardhome-sync in Docker on Node 1.
Append the sync service to /opt/adguard-ha/docker-compose.yml on Node 1:
# Append to /opt/adguard-ha/docker-compose.yml on Node 1
  adguardhome-sync:
    image: ghcr.io/bakito/adguardhome-sync:v0.6.14
    container_name: adguardhome-sync
    restart: unless-stopped
    environment:
      - ORIGIN_URL=http://192.168.1.10:3000
      - ORIGIN_USERNAME=adguardadmin
      - ORIGIN_PASSWORD=YourSecurePassword123!
      - REPLICA_URL=http://192.168.1.11:3000
      - REPLICA_USERNAME=adguardadmin
      - REPLICA_PASSWORD=YourSecurePassword123!
      - CRON=*/5 * * * *
      - RUN_ON_START=true
      - FEATURES_GENERAL_SETTINGS=true
      - FEATURES_REWRITES=true
      - FEATURES_FILTER_LISTS=true
      - FEATURES_CLIENTS=true
      - FEATURES_SERVICES=true
Re-run Docker Compose on Node 1:
docker compose up -dInspect the synchronization logs to verify seamless replication:
docker logs -f adguardhome-syncStep 5: Testing Live VRRP Failover
Before updating your main DHCP router, test the resilience of your cluster from any workstation on the network:
- Send continuous DNS lookups to the Virtual IP:
# On your client workstation while true; do dig @192.168.1.5 google.com +short; sleep 0.5; done - Simulate a catastrophic primary failure by stopping the AdGuard container on Node 1:
# On Node 1 docker stop adguardhome - Watch the client terminal. The continuous
digstream will continue uninterrupted without a single dropped packet. Node 2 detects the health check failure, assumes MASTER state, and claims192.168.1.5. - Restart the primary container (
docker start adguardhome). Node 1 automatically reclaims the MASTER role due to its higher VRRP priority.
Once validated, log into your main network router (OPNsense, UniFi, pfSense, or consumer router) and update the DHCP Server options: set DNS Server 1 to 192.168.1.5 and leave DNS Server 2 empty.
Troubleshooting Common Production Pitfalls
1. VRRP Split-Brain: Both Nodes Claim the Virtual IP
Symptoms: Running ip addr on both nodes displays 192.168.1.5 simultaneously, causing erratic DNS resolution and packet loss.
Resolution: VRRP relies on multicast packets sent to 224.0.0.18. Managed network switches with aggressive IGMP snooping often drop these packets. Ensure IGMP snooping is disabled on your switch port VLAN, verify that host firewalls permit VRRP traffic:
sudo ufw allow in on eth0 proto vrrp2. AdGuard Fails to Start: “bind: address already in use” on Port 53
Symptoms: The AdGuard container exits immediately with code 1, reporting an inability to bind to UDP/TCP port 53.
Resolution: A host service is still bound to port 53. Check active bindings with sudo lsof -i :53. Common culprits include dnsmasq, bind9, or an incomplete systemd-resolved disablement. Ensure DNSStubListener=no was set in Step 1.
3. AdGuardHome-Sync Loop or Authentication Lockout
Symptoms: AdGuardHome-Sync logs 403 Forbidden or triggers account rate-limiting.
Resolution: Ensure both nodes are running identical minor versions of AdGuard Home. Verify that the administrative user account has complete administrative privileges and does not require multi-factor authentication (2FA) for API endpoints.
Conclusion & Next Steps
Deploying dual AdGuard Home instances with Keepalived and AdGuardHome-Sync turns a brittle homelab DNS setup into a rock-solid, enterprise-grade high-availability system. Your entire household or office benefits from network-wide privacy filtering, lightning-fast cached DNS queries, and zero-downtime maintenance windows.
To further enhance your infrastructure, configure Caddy as a reverse proxy with automated SSL to encrypt internal WebUI access, explore Docker host and bridge networking architectures, or route remote mobile devices through your HA DNS using a Tailscale subnet router.

Hi, I’m Mark, the author of Clever IT Solutions: Mastering Technology for Success. I am passionate about empowering individuals to navigate the ever-changing world of information technology. With years of experience in the industry, I have honed my skills and knowledge to share with you. At Clever IT Solutions, we are dedicated to teaching you how to tackle any IT challenge, helping you stay ahead in today’s digital world. From troubleshooting common issues to mastering complex technologies, I am here to guide you every step of the way. Join me on this journey as we unlock the secrets to IT success.