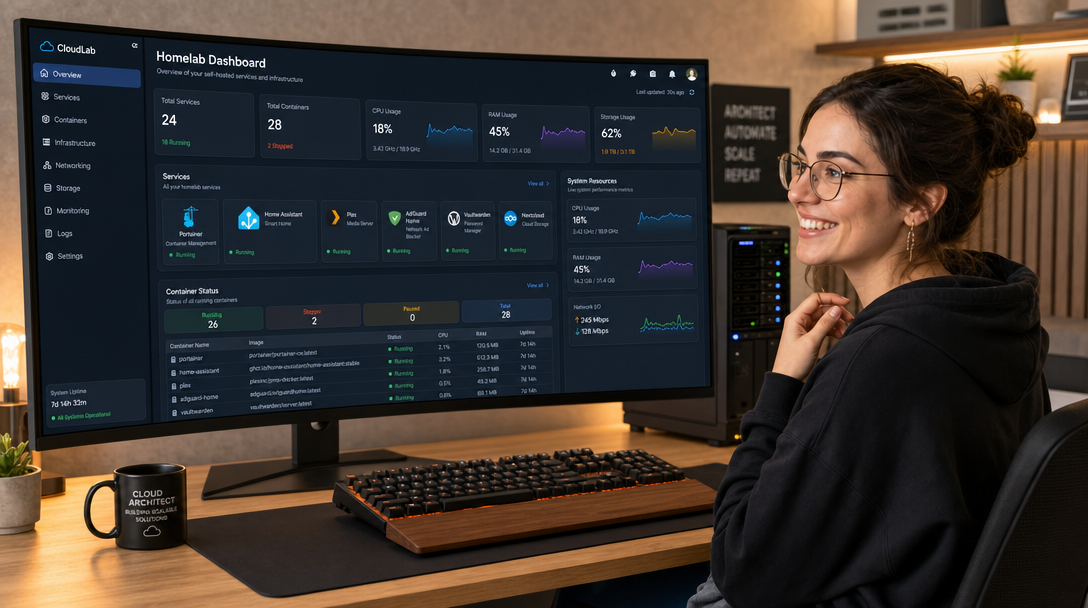
As self-hosted environments grow from a single media server into multi-node homelabs and edge clusters, organizing access to dozens of running services becomes an operational challenge. Remembering port numbers, internal IP addresses, and DNS subdomains across separate Docker hosts, hypervisors, and storage appliances quickly leads to browser tab chaos. Without a centralized application gateway, finding services like Nextcloud, Vaultwarden, Grafana, or Proxmox requires rummaging through browser bookmarks or terminal command histories.
Early self-hosters turned to first-generation application dashboards such as Heimdall, Flame, or Organizr. While visually appealing, many of these legacy tools suffer from noticeable drawbacks: they require manual UI form inputs for every new service, rely on internal databases that complicate backup automation, lack native Docker socket auto-discovery, and impose noticeable resource bloat. Conversely, heavy configurable dashboards like Dashy offer extensive feature sets but can suffer from steep configuration complexity and sluggish client-side rendering performance.
Homepage (developed by the gethomepage team) has rapidly emerged as the gold standard for modern infrastructure dashboards. Built with Next.js and Tailwind CSS, Homepage is a blazing-fast, statically compiled, highly responsive application dashboard configured entirely through declarative YAML files. It requires no database, boots in milliseconds, and features first-class Docker socket integration. It automatically detects container lifecycles, displays real-time CPU and memory usage, and connects directly with over 100 native service API widgets (including Pi-hole, AdGuard Home, Proxmox VE, TrueNAS, Plex, and Uptime Kuma) without requiring custom code.
In this comprehensive guide, you will learn how to deploy Homepage in Docker Compose, configure a secure read-only Docker socket proxy, structure declarative YAML configurations, integrate real-time service widgets, and implement security hardening for production peace of mind.
Architecture: Declarative Configuration and Service Discovery
Homepage’s design philosophy separates operational state from configuration. Rather than maintaining state inside an opaque database blob, Homepage reads a clean set of YAML files from a mounted configuration folder on every reload. Changes made to your YAML files or Docker container labels are immediately reflected in the browser without container restarts.
The following diagram illustrates how Homepage communicates with local container engines, remote API endpoints, and client web browsers:
+-----------------------------------------------------------------------+
|                    Client Browser / Admin Device                      |
|                       (HTTPS / Port 443 / 3000)                       |
+-----------------------------------+-----------------------------------+
                                    |
                            (Secure Web Traffic)
                                    v
+-----------------------------------------------------------------------+
|                      Reverse Proxy (Caddy / Traefik)                  |
|                - TLS Termination, Let's Encrypt SSL, SSO              |
+-----------------------------------+-----------------------------------+
                                    |
                            (Internal Network)
                                    v
+-----------------------------------------------------------------------+
|                      Homepage Container (Docker)                      |
|  +-----------------------------------------------------------------+  |
|  |                 Next.js Frontend & API Aggregator               |  |
|  |   - Server-Side Rendering (SSR) for Instant Load Times          |  |
|  |   - Live Background Polling of Remote Widgets                   |  |
|  +----------------+-------------------------------+----------------+  |
|                   |                               |                   |
| (Mount: /app/config)                              | (REST / Metrics)  |
|                   v                               v                   |
|  +--------------------------------+   +----------------------------+  |
|  |     Declarative YAML Config    |   |     Integrated Services    |  |
|  |   - settings.yaml (Layout)     |   |   - Pi-hole / AdGuard DNS  |  |
|  |   - services.yaml (App Cards)  |   |   - Proxmox VE Nodes       |  |
|  |   - widgets.yaml (Weather/HW)  |   |   - TrueNAS Storage Pools  |  |
|  |   - docker.yaml (Sockets)      |   |   - Uptime Kuma Statuses   |  |
|  +--------------------------------+   +----------------------------+  |
|                   |                                                   |
|                   v                                                   |
|  +-----------------------------------------------------------------+  |
|  |           Docker Socket Proxy (Tecativa / Wollomatic)           |  |
|  |   - Read-Only Security Boundary on /var/run/docker.sock         |  |
|  |   - Filters Out Write / Delete / Exec Capabilities              |  |
|  +--------------------------------+--------------------------------+  |
+-----------------------------------|-----------------------------------+
                                    v
                 [ Local Docker Daemon Engine (/var/run) ]
Key highlights of this architecture include:
- Zero Database Overhead: Backing up your dashboard requires nothing more than copying your
/configfolder or version-controlling it in Git. There are no database tables to corrupt or migrate. - Hardened Socket Isolation: Directly mounting
/var/run/docker.sockinto web applications presents severe privilege escalation risks. By interposing a read-only Docker socket proxy, Homepage can query container states and resource metrics while remaining strictly blocked from modifying or starting containers. - Unified API Aggregation: Instead of loading heavy third-party JavaScript tracking scripts inside client browsers, Homepage queries remote API endpoints server-side and serves pre-formatted, sanitized widget data directly to the user interface.
Prerequisites and Host Directory Preparation
Before launching the deployment, ensure your host environment meets the following requirements:
- A modern Linux server (Ubuntu 24.04/22.04 LTS, Debian 12, or AlmaLinux 9).
- Docker Engine v24.0+ and Docker Compose v2.20+ installed.
- A dedicated directory for Homepage configuration files and custom icons.
Create the directory structure on your host filesystem:
sudo mkdir -p /opt/homepage/config
sudo mkdir -p /opt/homepage/config/icons

# Ensure proper permissions for container execution
sudo chown -R 1000:1000 /opt/homepage
chmod -R 750 /opt/homepage
cd /opt/homepage
Production Docker Compose Configuration
To adhere to security best practices, we deploy Homepage alongside docker-socket-proxy. This proxy restricts the Docker API, exposing only read-only endpoints (/containers/json, /version) while blocking destructive operations.
Create /opt/homepage/compose.yaml:
services:
  homepage:
    image: ghcr.io/gethomepage/homepage:latest
    container_name: homepage
    restart: unless-stopped
    ports:
      # Bind to localhost; route via reverse proxy
      - "127.0.0.1:3000:3000"
    volumes:
      # Declarative YAML configuration directory
      - /opt/homepage/config:/app/config
    environment:
      - PUID=1000
      - PGID=1000
      - TZ=UTC
    depends_on:
      docker-proxy:
        condition: service_started
    deploy:
      resources:
        limits:
          cpus: '1.0'
          memory: 1024M
        reservations:
          memory: 256M
    security_opt:
      - no-new-privileges:true
    networks:
      - homepage-net

  docker-proxy:
    image: ghcr.io/tecnativa/docker-socket-proxy:latest
    container_name: homepage-docker-proxy
    restart: unless-stopped
    environment:
      # Grant read-only access to container status and information
      - CONTAINERS=1
      - INFO=1
      - VERSION=1
      # Deny all write, delete, and execution endpoints
      - POST=0
      - DELETE=0
      - BUILD=0
      - COMMIT=0
      - EXEC=0
      - VOLUMES=0
      - NETWORKS=0
    volumes:
      # Mount host docker daemon into proxy
      - /var/run/docker.sock:/var/run/docker.sock:ro
    security_opt:
      - no-new-privileges:true
    networks:
      - homepage-net

networks:
  homepage-net:
    driver: bridge
Launch the stack:
docker compose up -dCheck the container logs to ensure clean initialization:
docker compose logs -f homepageConfiguring Declarative YAML Files
Upon initial startup, Homepage automatically populates /opt/homepage/config with default configuration templates. We will customize four core files: settings.yaml, docker.yaml, widgets.yaml, and services.yaml.
1. settings.yaml: Visual Layout and Theme Settings
Edit /opt/homepage/config/settings.yaml to establish dashboard layout, appearance, and search provider:
---
title: "Operations Hub"
favicon: https://raw.githubusercontent.com/gethomepage/homepage/main/public/favicon.ico
background:
  opacity: 50
theme: dark
color: slate
layout:
  Core Infrastructure:
    style: row
    columns: 3
  Monitoring & Observability:
    style: row
    columns: 3
  Media & Storage:
    style: row
    columns: 2

headerStyle: clean
statusStyle: dot
2. docker.yaml: Connecting to the Docker Socket Proxy
Configure Homepage to connect to the internal socket proxy in /opt/homepage/config/docker.yaml:
---
my-docker:
  host: docker-proxy
  port: 2375
Because both containers reside on the shared homepage-net network, Homepage connects securely to the proxy over unencrypted HTTP on port 2375 inside the isolated Docker network, while the host Docker socket remains completely isolated from external exposure.
3. widgets.yaml: Top Bar Diagnostic Widgets
Configure top-level metrics in /opt/homepage/config/widgets.yaml to display greeting, system resources, and search:
---
- greeting:
    text_size: xl
    text: "DevOps & Homelab Operations"

- resources:
    cpu: true
    memory: true
    disk: /app/config
    cputemp: false
    units: metric

- search:
    provider: duckduckgo
    target: _blank
4. services.yaml: Service Cards with Live API Widgets
This is where Homepage truly shines. In /opt/homepage/config/services.yaml, define your applications grouped by category. Each service card can be enhanced with container monitoring and real-time status indicators:
---
- Core Infrastructure:
    - Dockge:
        icon: dockge.png
        href: "https://dockge.yourdomain.com"
        description: "Docker Compose Stack Manager"
        container: dockge
        server: my-docker
        widget:
          type: customapi
          url: "http://dockge:5001/api/health"
          mappings:
            - field: ok
              label: Status

    - Vaultwarden:
        icon: vaultwarden.png
        href: "https://vault.yourdomain.com"
        description: "Zero-Knowledge Password Vault"
        container: vaultwarden
        server: my-docker

- Monitoring & Observability:
    - Uptime Kuma:
        icon: uptime-kuma.png
        href: "https://status.yourdomain.com"
        description: "Service Availability & SLA Tracking"
        container: uptime-kuma
        server: my-docker
        widget:
          type: uptimekuma
          url: "http://uptime-kuma:3001"
          slug: default

    - ChangeDetection:
        icon: changedetection.png
        href: "https://changedetection.yourdomain.com"
        description: "Web & API Change Monitor"
        container: changedetection
        server: my-docker

- Network & Security:
    - AdGuard Home:
        icon: adguard-home.png
        href: "https://adguard.yourdomain.com"
        description: "Network-Wide DNS Sinkhole"
        widget:
          type: adguard
          url: "http://192.168.1.5:80"
          username: admin
          password: YourAdguardPassword
Save the file and refresh your browser. Homepage immediately renders a stunning, dark-mode dashboard displaying live container CPU usage, memory consumption, DNS query stats from AdGuard, and active service statuses.
Integrating Proxmox VE and Storage Appliances
Beyond container-level monitoring, Homepage excels at centralizing bare-metal and hypervisor metrics. For administrators running Proxmox Virtual Environment (PVE), you can display active virtual machine counts, LXC container allocations, CPU core loads, and cluster memory usage directly on your primary node card. To achieve this without granting root hypervisor access, create a dedicated Proxmox API token with PVEAuditor read-only privileges. In services.yaml, supply the node endpoint, token ID, and secret. Homepage will periodically poll the Proxmox REST API asynchronously, ensuring your dashboard presents live node utilization without incurring virtualization lag.
Similarly, storage appliances like TrueNAS SCALE or TrueNAS CORE can expose ZFS storage pool health, allocated capacity, and dataset compression ratios. By configuring TrueNAS API keys within Homepage’s widget definitions, system administrators can instantly spot pool degradation or capacity warnings before hard drives suffer catastrophic hardware failure.
Automatic Docker Service Discovery via Labels
If you prefer not to edit services.yaml every time you spin up a new container, Homepage supports automatic container discovery via Docker labels. Simply add the following labels to any service in your Compose files:
services:
  whoami:
    image: traefik/whoami
    container_name: whoami
    labels:
      - "gethomepage.name=WhoAmI Service"
      - "gethomepage.group=Development"
      - "gethomepage.icon=whoami.png"
      - "gethomepage.href=https://whoami.yourdomain.com"
      - "gethomepage.description=HTTP Request Header Debugger"
When the container starts, the socket proxy informs Homepage, which automatically creates a card under the “Development” group without editing a single configuration file.
Production Hardening and Reverse Proxy Setup
Because Homepage aggregates links to all your internal tools, securing the dashboard is non-negotiable. Follow these production hardening measures:
1. Terminate TLS with a Reverse Proxy (Caddy)
Bind Homepage strictly to 127.0.0.1:3000 and enforce automatic HTTPS using Caddy:
hub.yourdomain.com {
    reverse_proxy 127.0.0.1:3000 {
        header_up Host {host}
        header_up X-Real-IP {remote_host}
        header_up X-Forwarded-For {remote_host}
        header_up X-Forwarded-Proto {scheme}
    }

    # Restrict to internal management subnets or VPN
    @internal {
        remote_ip 10.0.0.0/8 192.168.1.0/24 100.64.0.0/10
    }
    handle @internal {
        # Allow internal network access
    }

    header {
        Strict-Transport-Security "max-age=31536000; includeSubDomains; preload"
        X-Content-Type-Options "nosniff"
        X-Frame-Options "SAMEORIGIN"
        Referrer-Policy "strict-origin-when-cross-origin"
    }
}
2. Gate Behind Single Sign-On (Authentik or Cloudflare Access)
Since Homepage does not have built-in multi-user database authentication by design, place it behind an identity-aware proxy such as Authentik or Cloudflare Zero Trust Access. This guarantees that only authorized administrators with active MFA can access the dashboard.
Troubleshooting Common Homepage Issues
Even with clean YAML files, configuration mistakes can occur. Here are three common issues and their tested solutions:
1. Widget Displays “API Error” or 401 Unauthorized
Symptom: A service card appears, but the embedded widget (e.g., Pi-hole or AdGuard) displays an orange “API Error” badge.
Root Cause: Incorrect credentials, missing API tokens, or network unreachability between the Homepage container and the target service.
Fix: Verify network reachability from inside the Homepage container using curl:
docker exec -it homepage curl -I http://192.168.1.5:80Ensure that credentials in services.yaml match the target API requirements (e.g., for Pi-hole v5/v6, verify whether an API token or web password is required by checking Homepage’s official widget documentation).
2. Docker Stats Not Appearing on Cards
Symptom: Container status dots remain grey, and CPU/memory stats do not populate.
Root Cause: The container name in services.yaml does not match the exact container_name running in Docker, or the server reference does not match docker.yaml.
Fix: Run docker ps --format "{{.Names}}" to inspect exact container identifiers. Ensure your service entry explicitly includes both server: my-docker and container: exact_name.
3. YAML Indentation Syntax Errors
Symptom: The web page fails to load, showing a red “YAML Parse Error” traceback.
Root Cause: YAML strictly forbids tab characters and requires exact two-space indentations. Accidental tabs or mismatched dashes break the parser.
Fix: Validate your configuration files on the host using Python’s built-in YAML parser or yamllint:
python3 -c "import yaml; yaml.safe_load(open('/opt/homepage/config/services.yaml'))"
echo "YAML syntax is valid!"
Conclusion and Next Steps
Homepage provides the ultimate front door for modern self-hosted infrastructure. By combining declarative YAML configuration, secure read-only Docker socket proxying, and comprehensive real-time widget support, Homepage delivers unmatched visual elegance without sacrificing system security or performance.
To further enhance your centralized operations hub, consider pairing Homepage with:
- Dockge: Jump directly from Homepage into interactive Compose stack editing and live terminal inspection.
- Git Version Control: Store your
/opt/homepage/configdirectory in a private Git repository to track layout updates and enable one-command disaster recovery. - Uptime Kuma: Embed live status badges on every service card to maintain real-time visibility into infrastructure availability.

Hi, I’m Mark, the author of Clever IT Solutions: Mastering Technology for Success. I am passionate about empowering individuals to navigate the ever-changing world of information technology. With years of experience in the industry, I have honed my skills and knowledge to share with you. At Clever IT Solutions, we are dedicated to teaching you how to tackle any IT challenge, helping you stay ahead in today’s digital world. From troubleshooting common issues to mastering complex technologies, I am here to guide you every step of the way. Join me on this journey as we unlock the secrets to IT success.