Provisioning physical hardware in a modern homelab, edge cluster, or bare-metal datacenter using physical USB thumb drives is tedious, fragile, and inefficient. Every time a new operating system release drops, or whenever a hypervisor node requires a clean rebuild, sysadmins are forced to re-image flash media, walk to the server rack, navigate firmware boot overrides, and manually click through interactive installers. For multi-node Kubernetes clusters, Proxmox VE environments, or continuous staging labs, this manual routine quickly becomes a major operational bottleneck.
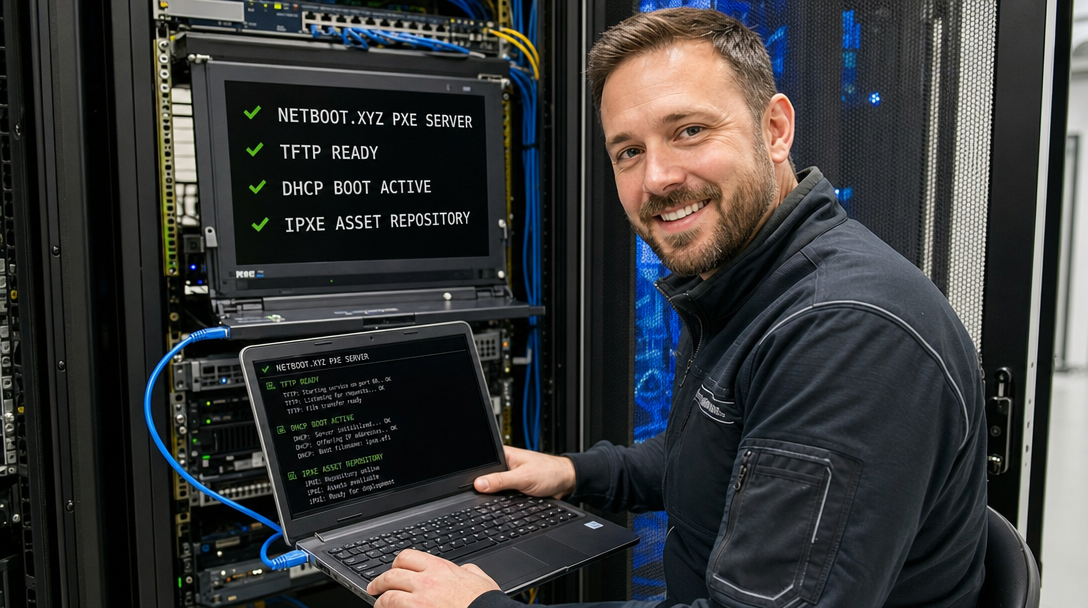
The industry-standard solution is network booting via Preboot Execution Environment (PXE) and modern iPXE chaining. By deploying Netboot.xyz inside a lightweight Docker container, you can turn any Linux server into a centralized operating system deployment hub. Netboot.xyz provides an elegant, menu-driven iPXE interface that enables bare-metal machines to download bootloaders, Linux kernels, live rescue environments, and unattended automated installers directly over your local area network (LAN) in seconds.
In this comprehensive guide, we will design, deploy, and harden a production-grade Netboot.xyz stack using Docker Compose. We will configure multi-architecture DHCP options for legacy BIOS and modern 64-bit UEFI hardware, set up local asset caching to avoid external internet dependencies, and configure automated, zero-touch cloud-init installations for Ubuntu Server and Debian.
Architecture Overview: The Modern iPXE Boot Chain
Traditional legacy PXE booting relies on TFTP (Trivial File Transfer Protocol) to deliver operating system installation kernels. While TFTP is universally supported by network interface cards (NICs), it operates over UDP using small 512-byte blocks with strict lock-step acknowledgments. Transferring a modern 2 GB Linux live kernel and initramfs over TFTP is excruciatingly slow and frequently drops packets on congested networks.
Netboot.xyz eliminates this bottleneck by utilizing a two-stage iPXE chainload architecture. TFTP is used only for the initial tiny bootloader (under 1 MB). Once loaded into system RAM, iPXE initializes the target machine’s network stack with full TCP/IP support, downloads its configuration menus, and streams multi-gigabyte ISOs and ramdisks at wire speed over standard HTTP.
+-----------------------------------------------------------------------------------+
|                           LOCAL AREA NETWORK (VLAN 10)                            |
+-----------------------------------------------------------------------------------+
       |                                                                      |
       v                                                                      v
+---------------+  1. DHCP Discover (PXE Request)                      +---------------+
| Target Server | ---------------------------------------------------> |  DHCP Router  |
|  (Bare-Metal) | <--------------------------------------------------- |  (OPNsense /  |
|               |  2. DHCP Offer: IP + Option 66 (TFTP) + 67 (Filename)|   dnsmasq)    |
+---------------+                                                      +---------------+
       |
       | 3. TFTP Request: netboot.xyz.efi / netboot.xyz.kpxe (Port 69 UDP)
       v
+-----------------------------------------------------------------------------------+
|                        NETBOOT.XYZ DOCKER CONTAINER HOST                          |
|                                                                                   |
|  +--------------------+        +--------------------+        +-----------------+  |
|  |    TFTP Daemon     |        |    Nginx Server    |        |   Web UI / API  |  |
|  |     (Port 69)      |        |    (Port 8080)     |        |   (Port 3000)   |  |
|  +--------------------+        +--------------------+        +-----------------+  |
|            |                             |                            |           |
|     Initial Stage 1               Stage 2 Assets &             Local Custom Menu  |
|       iPXE Binary                   Kernel Stream                Configuration    |
+-----------------------------------------------------------------------------------+
       |                                   |
       | 4. Stage 1 Binary Executes        |
       +-----------------------------------+
       |
       | 5. HTTP Get: http://192.168.10.50:8080/menus/boot.cfg
       | 6. HTTP Stream: vmlinuz + initrd.img (Gigabit Wire Speed)
       v
+---------------+
| Target Server | ===> Unattended OS Installation / Live Rescue Environment Loaded
+---------------+
This hybrid approach yields significant operational advantages:
- Universal Hardware Support: Automatically differentiates between legacy BIOS (x86), modern UEFI (x86_64), and ARM64 (aarch64) firmware clients.
- Wire-Speed Kernel Transfers: Downloads kernels and root filesystems via high-throughput HTTP rather than fragile TFTP.
- Centralized Customization: Maintain single-point-of-truth configuration files and automated kickstart/preseed scripts without modifying target disks.
- Air-Gapped & Local Caching: Cache official upstream distro releases locally to ensure provisioning continues even during external ISP outages.
Prerequisites & Environment Planning
Before launching the container, ensure your environment meets the following specifications:
- Host Operating System: Debian 12, Ubuntu 24.04 LTS, or a lightweight dedicated Linux server with Docker Engine 26+ and Docker Compose v2 installed.
- Static IP Allocation: The Docker host must have a static IP address on your local subnet (for this guide:
192.168.10.50). - Router / DHCP Access: Administrative access to configure DHCP options (Option 66 and Option 67) on your network gateway (e.g., pfSense, OPNsense, UniFi Dream Machine, OpenWrt, or Pi-hole / dnsmasq).
- Dedicated Storage: At least 20 GB of free disk space if you plan to mirror operating system images locally.
Step 1: Directory Setup & Permission Structure
Create a dedicated workspace on your host filesystem for Netboot.xyz persistent configurations, local custom menus, and downloaded OS assets:
sudo mkdir -p /opt/netbootxyz/config
sudo mkdir -p /opt/netbootxyz/assets

# Set appropriate user permissions for non-root execution
sudo chown -R 1000:1000 /opt/netbootxyz
sudo chmod -R 755 /opt/netbootxyz
Step 2: Production Docker Compose Configuration
We deploy Netboot.xyz using the hardened, actively maintained container provided by the LinuxServer.io ecosystem. It bundles the TFTP daemon, an optimized Nginx web asset server, and an optional lightweight Web UI for editing boot menus directly from a browser.
Create /opt/netbootxyz/docker-compose.yml:
services:
  netbootxyz:
    image: lscr.io/linuxserver/netbootxyz:latest
    container_name: netbootxyz
    restart: unless-stopped
    environment:
      - PUID=1000
      - PGID=1000
      - TZ=UTC
      - SUBFOLDER=/ # Use '/' unless serving behind a reverse proxy sub-path
    volumes:
      - /opt/netbootxyz/config:/config
      - /opt/netbootxyz/assets:/assets
    ports:
      # TFTP Boot Service (UDP)
      - "69:69/udp"
      # Web Configuration GUI
      - "3000:3000/tcp"
      # Fast HTTP Asset and Kernel Delivery
      - "8080:80/tcp"
    security_opt:
      - no-new-privileges:true
    logging:
      driver: "json-file"
      options:
        max-size: "10m"
        max-file: "3"
Start the container stack in detached mode and verify its initialization:
cd /opt/netbootxyz
docker compose up -d

# Inspect container startup logs
docker compose logs -f netbootxyz
Within a few seconds, the container initializes the TFTP root directory, populates default iPXE binaries inside /opt/netbootxyz/config/menus, and begins serving the configuration dashboard on port 3000.
Step 3: DHCP Gateway Configuration for Dual BIOS and UEFI
For bare-metal machines to locate your Netboot.xyz server, your network’s DHCP server must deliver two critical configuration parameters to clients during DHCP negotiation:
- Option 66 (Next-Server / TFTP Server IP): The IP address of your Docker host (
192.168.10.50). - Option 67 (Bootfile Name): The specific bootloader binary the NIC must download from the TFTP server.
Because physical machines use either Legacy BIOS or 64-bit UEFI firmware, serving a single static filename will cause half of your hardware fleet to fail during boot. Below are configuration examples for the most common network routers and DHCP servers.
Option A: OPNsense / pfSense (Kea or ISC DHCP)
If you use OPNsense or pfSense:
- Navigate to Services > DHCP Server > [Your LAN/VLAN Interface].
- Scroll down to Network Booting and check Enable network booting.
- Set Next Server to
192.168.10.50. - Set Default BIOS file name to
netboot.xyz.kpxe. - Set UEFI 32-bit file name to
netboot.xyz-i386.efi. - Set UEFI 64-bit file name to
netboot.xyz.efi. - Set ARM 64-bit file name to
netboot.xyz-arm64.efi. - Save and apply changes.
Option B: Dnsmasq / Pi-hole
If you run dnsmasq or Pi-hole as your local DHCP server, create a custom configuration snippet at /etc/dnsmasq.d/05-netboot.conf:
# Enable DHCP PXE boot options
dhcp-boot=netboot.xyz.kpxe,192.168.10.50,192.168.10.50

# Match architecture options for UEFI clients
dhcp-match=set:bios,option:client-arch,0
dhcp-match=set:efi-x86_64,option:client-arch,7
dhcp-match=set:efi-x86_64,option:client-arch,9
dhcp-match=set:efi-arm64,option:client-arch,11

# Deliver architecture-specific bootfiles
dhcp-boot=tag:bios,netboot.xyz.kpxe,192.168.10.50,192.168.10.50
dhcp-boot=tag:efi-x86_64,netboot.xyz.efi,192.168.10.50,192.168.10.50
dhcp-boot=tag:efi-arm64,netboot.xyz-arm64.efi,192.168.10.50,192.168.10.50
Restart dnsmasq or Pi-hole to activate the rule:
sudo systemctl restart dnsmasq
# Or on Pi-hole:
pihole restartdns
Step 4: Customizing Netboot Menus & Local Asset Caching
By default, Netboot.xyz streams official Linux distribution installers from upstream internet mirrors (such as Canonical, Debian, or kernel.org mirrors). To eliminate WAN latency and support isolated offline lab environments, you can point Netboot.xyz to your local HTTP asset server.
Open http://192.168.10.50:3000 in your web browser to view the Netboot.xyz management dashboard, or edit the text files directly under /opt/netbootxyz/config/menus/.
To override global endpoint variables, edit /opt/netbootxyz/config/menus/local_vars.pkm:
#!ipxe
# Custom local overrides for Netboot.xyz
set live_endpoint http://192.168.10.50:8080/assets
set boot_domain 192.168.10.50:8080
Now, let us create a custom menu entry for a high-performance local rescue and diagnostic suite. Edit /opt/netbootxyz/config/menus/custom/custom.ipxe:
#!ipxe
### Homelab Custom Network Boot Menu ###

:custom_menu
menu Homelab Local Infrastructure Deployment
item --gap --             ---------------- Operating Systems ----------------
item ubuntu_autoinstall   Ubuntu Server 24.04 LTS (Zero-Touch Cloud-Init)
item debian_unattended    Debian 12 Bookworm (Automated Preseed)
item proxmox_installer    Proxmox VE 8.2 Virtualization Hypervisor
item --gap --             ---------------- Diagnostics & Tools ----------------
item memtest86            PassMark MemTest86+ Memory Diagnostics
item clonezilla           Clonezilla Live Disk Imaging Tool
item shell                Drop to iPXE Interactive Command Shell
item return               Return to Main Netboot.xyz Menu
choose target || goto custom_menu
goto ${target}

:ubuntu_autoinstall
echo Initializing Automated Ubuntu Server Installation...
set server_ip 192.168.10.50:8080
set kernel_url http://${server_ip}/assets/ubuntu-24.04/vmlinuz
set initrd_url http://${server_ip}/assets/ubuntu-24.04/initrd
kernel ${kernel_url} initrd=initrd ip=dhcp url=http://${server_ip}/assets/ubuntu-24.04/ubuntu-24.04-live-server-amd64.iso autoinstall ds=nocloud-net;s=http://${server_ip}/cloud-init/
initrd ${initrd_url}
boot

:debian_unattended
echo Initializing Automated Debian 12 Preseed Installation...
set server_ip 192.168.10.50:8080
kernel http://${server_ip}/assets/debian-12/linux auto=true priority=critical preseed/url=http://${server_ip}/preseed/debian.cfg
initrd http://${server_ip}/assets/debian-12/initrd.gz
boot

:memtest86
echo Booting Memtest86+...
chain http://192.168.10.50:8080/assets/memtest.efi || goto custom_menu

:shell
echo Dropping into iPXE interactive shell. Type 'exit' to return.
shell
goto custom_menu

:return
chain boot.cfg
Step 5: Implementing Zero-Touch Automated Cloud-Init Provisioning
The true power of bare-metal network installation emerges when paired with automated unattended provisioning. In modern Ubuntu releases, Canonical relies on Subiquity and Cloud-Init via the nocloud-net data source.
Create a directory on your host to store cloud-init templates and expose them via Nginx:
sudo mkdir -p /opt/netbootxyz/assets/cloud-init
sudo mkdir -p /opt/netbootxyz/assets/ubuntu-24.04
Download the official Ubuntu 24.04 server ISO, extract the kernel and initramfs to your assets folder, and create the required Cloud-Init metadata files:
# Empty meta-data file (mandatory for nocloud-net)
sudo touch /opt/netbootxyz/assets/cloud-init/meta-data
Now create /opt/netbootxyz/assets/cloud-init/user-data:
#cloud-config
autoinstall:
  version: 1
  locale: en_US.UTF-8
  keyboard:
    layout: us
  identity:
    hostname: k8s-worker-node
    username: sysadmin
    # Generate SHA-512 password hash with: mkpasswd -m sha-512 "YourPassword"
    password: "$6$rounds=4096$saltstring$hashedpasswordhere..."
  ssh:
    install-server: true
    allow-pw: false
    authorized-keys:
      - ssh-ed25519 AAAAC3NzaC1lZDI1NTE5AAAAIGhomelabAdminKeyYourPubString admin@homelab
  storage:
    layout:
      name: direct
  packages:
    - qemu-guest-agent
    - curl
    - htop
    - vim
    - git
  late-commands:
    # Run immediate post-install hardening
    - curtin in-target --target=/target -- systemctl enable ssh
    - curtin in-target --target=/target -- systemctl enable qemu-guest-agent
When any bare-metal target powers on and selects Ubuntu Server 24.04 LTS (Zero-Touch Cloud-Init) from your network menu, it streams the kernel, mounts the installation media in memory, parses user-data, partitions the primary disk, creates the administrative user, configures SSH keys, and reboots into a clean, ready-to-use production server with zero human intervention.
Security Hardening & Production Best Practices
Deploying a network boot server introduces direct bare-metal provisioning capabilities into your infrastructure. Apply these security controls to protect your environment:
- VLAN Isolation: Never run PXE boot services on public, untrusted, or general office Wi-Fi subnets. Confine your Netboot.xyz container and DHCP Option 66/67 directives strictly to a dedicated Management or Provisioning VLAN (e.g., VLAN 10).
- Enforce Port Security & DHCP Snooping: On your managed switches, enable DHCP Snooping to prevent unauthorized rogue DHCP servers from hijacking network boot traffic. Mark only your authentic router port as a trusted DHCP interface.
- UEFI Secure Boot Policy: If Secure Boot is enforced on your target servers, ensure you use Microsoft-signed iPXE binaries (
netboot.xyz-snp.efi) or enroll custom Machine Owner Keys (MOK) on client hardware. - Container Rootless & Read-Only Execution: Bind the container to an unprivileged system user (UID/GID 1000) as specified in our Compose file. For extreme hardening, set the configuration directory read-only (
:ro) once production menu templates are frozen.
Troubleshooting: Common PXE & iPXE Failure Modes
Network booting involves multiple network layers (NIC firmware, DHCP options, TFTP UDP, and HTTP TCP). When provisioning stalls, use the following structured solutions:
1. Error: “PXE-E32: TFTP Open Timeout” or Client Hangs at DHCP
Symptom: The target client obtains an IP address via DHCP but immediately halts with a timeout message while attempting to load netboot.xyz.kpxe or netboot.xyz.efi.
Root Cause: UDP port 69 is blocked by host firewall rules (ufw or nftables), or Docker is running on a multi-homed system where UDP return traffic is routing through the incorrect physical interface.
Solution: Verify that port 69/udp is actively listening on the host and that firewall rules permit inbound traffic:
# Verify host port binding
sudo ss -ulpn | grep :69

# Allow inbound TFTP traffic if UFW is active
sudo ufw allow 69/udp

# Test TFTP accessibility from a secondary machine on the same VLAN
tftp 192.168.10.50 -c get netboot.xyz.kpxe
2. Error: “NBP File Downloaded Successfully, Then Immediate System Reboot”
Symptom: A modern UEFI server downloads the bootfile over TFTP, displays a quick flash on screen, and immediately reboots back to the BIOS firmware screen.
Root Cause: The client machine received the 16-bit legacy BIOS binary (netboot.xyz.kpxe) instead of the 64-bit UEFI binary (netboot.xyz.efi), or hardware Secure Boot rejected an unsigned custom iPXE image.
Solution:
- Verify that your DHCP server correctly evaluates the
client-archparameter and deliversnetboot.xyz.efifor architecture tags 7 and 9. - In the target server’s firmware setup, either temporarily disable Secure Boot or switch the bootfile to
netboot.xyz-snp.efi, which utilizes the native UEFI Simple Network Protocol driver.
3. Error: “Kernel Panic: Unable to mount root fs” or HTTP Asset 404
Symptom: The iPXE menu loads cleanly, but choosing an operating system results in a kernel panic or an iPXE error: http://192.168.10.50:8080/assets/...: No such file or directory.
Root Cause: The asset path specified in your custom .ipxe script does not match the actual folder structure mapped inside the Docker container, or file permissions prevent Nginx from reading the ISO/kernel files.
Solution: Test the HTTP asset URL directly using curl from any workstation on the network:
# Test web asset accessibility
curl -I http://192.168.10.50:8080/assets/ubuntu-24.04/vmlinuz

# Inspect container internal permissions
docker compose exec netbootxyz ls -la /assets/ubuntu-24.04/
Conclusion
By deploying Netboot.xyz with Docker Compose, you eliminate flash drives and manual media burning from your bare-metal workflow. Combining lightweight TFTP handoff with wire-speed HTTP kernel streaming provides a fast, resilient deployment foundation capable of provisioning dozens of bare-metal physical hosts simultaneously.
With multi-architecture DHCP routing in place and custom cloud-init automation configured, rebuilding a crashed Proxmox hypervisor or deploying a fleet of multi-node Kubernetes worker nodes becomes as simple as connecting an Ethernet cable and powering on the machine.

Hi, I’m Mark, the author of Clever IT Solutions: Mastering Technology for Success. I am passionate about empowering individuals to navigate the ever-changing world of information technology. With years of experience in the industry, I have honed my skills and knowledge to share with you. At Clever IT Solutions, we are dedicated to teaching you how to tackle any IT challenge, helping you stay ahead in today’s digital world. From troubleshooting common issues to mastering complex technologies, I am here to guide you every step of the way. Join me on this journey as we unlock the secrets to IT success.