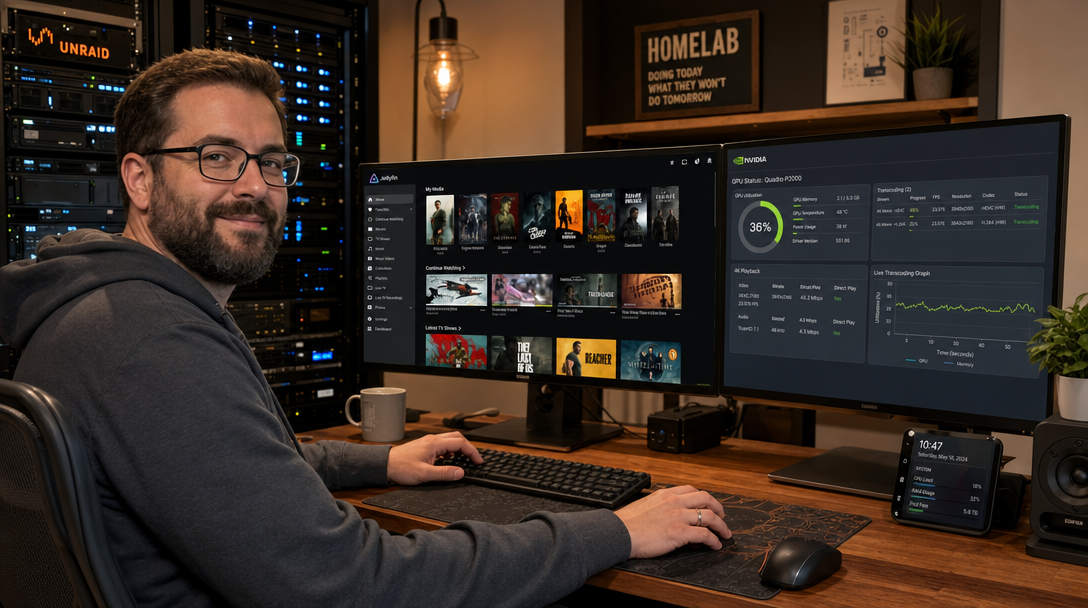
Self-hosting a private digital home media server has become essential for privacy-conscious engineers and homelab operators seeking to break free from proprietary streaming walled gardens and subscription fees. While platforms like Plex and Emby offer functional interfaces, they gate hardware transcoding behind proprietary licensing models, introduce third-party authentication telemetry, and increasingly push sponsored ad-supported content. Jellyfin is the premier 100% free, open-source, and privacy-respecting media system. It contains zero tracking, requires no account on external servers, and provides comprehensive hardware-accelerated transcoding capabilities completely out of the box.
However, running Jellyfin on standard CPU compute quickly introduces severe performance bottlenecks. Decoding 4K HEVC (H.265) 10-bit video streams, converting surround audio codecs, and applying real-time HDR-to-SDR tone mapping will saturate multi-core server CPUs within seconds, causing stuttering playback and thermal throttling. By passing a dedicated NVIDIA GPU into the Jellyfin Docker container using the NVIDIA Container Toolkit, you unlock dedicated silicon—NVIDIA NVDEC (hardware decoding) and NVENC (hardware encoding)—allowing your server to transcode multiple simultaneous 4K streams smoothly with near-zero CPU overhead.
Architecture & Hardware Transcoding Pipeline
Hardware transcoding in Jellyfin does not merely convert video bitrates; it executes a multi-stage decoding, filtering, scaling, and re-encoding pipeline inside the GPU’s Application-Specific Integrated Circuit (ASIC) cores. The process operates through three distinct hardware layers:
- NVDEC (NVIDIA Video Decoder): Ingests compressed high-efficiency codecs (HEVC/H.265, AV1, VP9, H.264) from storage and decodes them into uncompressed planar YUV frames entirely in GPU VRAM.
- CUDA / OpenCL Compute (VRAM Processing & Tone Mapping): Executes color space transformations, subtitle burn-in, and Tone Mapping (converting high dynamic range HDR10/Dolby Vision color metadata to Rec.709 SDR) without copying frames back to host system RAM.
- NVENC (NVIDIA Video Encoder): Compresses the processed video frames into client-compatible formats (H.264 or HEVC) in real time and streams the packets via HTTP Live Streaming (HLS) chunks to web browsers, mobile devices, and smart TVs.
+-----------------------------------------------------------------------+
|                            CLIENT DEVICES                             |
|          Smart TV / Mobile App / Web Browser / Apple TV / Kodi        |
+-----------------------------------------------------------------------+
                                    |
                    HTTPS (Port 443) / HLS Video Segments
                                    v
+-----------------------------------------------------------------------+
|                    EDGE REVERSE PROXY (Caddy)                         |
|            Automatic TLS, WebSocket Buffering & Large Headers          |
+-----------------------------------------------------------------------+
                                    |
                           Internal Bridge Network
                                    v
+-----------------------------------------------------------------------+
|                     JELLYFIN CONTAINER (Port 8096)                    |
|                         jellyfin/jellyfin:latest                      |
|       - Media Metadata Scraper & Web Interface                        |
|       - ffmpeg Transcode Orchestrator                                 |
|       - Direct Access to NVIDIA Device (CDI / nvidia-container-cli)   |
+-----------------------------------------------------------------------+
                                    |
               PCIe Passthrough (NVDEC -> CUDA -> NVENC)
                                    v
+-----------------------------------------------------------------------+
|                        NVIDIA GPU HARDWARE                            |
|       GeForce RTX / Quadro / Tesla (Driver 550+ & CUDA 12+)           |
|       - Hardware Decode: HEVC 10-bit / VP9 / AV1 (NVDEC)              |
|       - Tone Mapping: OpenCL / VRAM Tone Mapping                      |
|       - Hardware Encode: High-Throughput H.264 / HEVC (NVENC)         |
+-----------------------------------------------------------------------+
                                    |
                   Bind Mounts (High-Throughput Storage)
                                    v
+-----------------------------------------------------------------------+
|                   HOST STORAGE / POOLED STORAGE                       |
|   /opt/jellyfin/config  |  /opt/jellyfin/cache  |  /mnt/storage/media |
+-----------------------------------------------------------------------+
Host Prerequisites & NVIDIA Container Toolkit Setup
To enable GPU passthrough to Docker containers, your host operating system requires proprietary NVIDIA Linux display drivers and the official NVIDIA Container Toolkit.
1. Verify NVIDIA Driver Installation
Execute nvidia-smi on your Linux host to verify that the GPU is recognized and that driver version 535 or newer is installed:
nvidia-smiIf drivers are missing on Ubuntu 24.04 or Debian 12, install the production headless driver branch:
sudo apt-get update
sudo apt-get install -y ubuntu-drivers-common
sudo ubuntu-drivers install --gpgpu nvidia:550-server
2. Install NVIDIA Container Toolkit
Configure the official NVIDIA repository and install the container runtime components:
# Add the NVIDIA GPG key and APT repository
curl -fsSL https://nvidia.github.io/libnvidia-container/gpgkey | sudo gpg --dearmor -o /usr/share/keyrings/nvidia-container-toolkit-keyring.gpg
curl -s -L https://nvidia.github.io/libnvidia-container/stable/deb/nvidia-container-toolkit.list | \
  sed 's#deb https://#deb [signed-by=/usr/share/keyrings/nvidia-container-toolkit-keyring.gpg] https://#g' | \
  sudo tee /etc/apt/sources.list.d/nvidia-container-toolkit.list

sudo apt-get update
sudo apt-get install -y nvidia-container-toolkit

# Configure the Docker daemon to register the nvidia runtime
sudo nvidia-ctk runtime configure --runtime=docker
sudo systemctl restart docker
3. Validate GPU Passthrough in Docker
Run a disposable test container to verify that Docker can access your GPU:
docker run --rm --gpus all nvidia/cuda:12.4.1-base-ubuntu22.04 nvidia-smiIf this command prints your GPU model, driver version, and VRAM capacity, your host environment is fully prepared for hardware-accelerated media streaming.
Production Directory Structure & Permissions
Create dedicated directories on the host for Jellyfin configuration, transcode caching, and Caddy reverse proxy data:
sudo mkdir -p /opt/jellyfin/{config,cache,caddy_data,caddy_config}
sudo mkdir -p /mnt/storage/media/{movies,tv,music}

# Establish user permissions (UID 1000 for standard unprivileged operations)
sudo chown -R 1000:1000 /opt/jellyfin/{config,cache}
cd /opt/jellyfin
Production Docker Compose Configuration
Create the /opt/jellyfin/docker-compose.yml file. In modern Docker Compose v2, passing GPUs is handled declaratively using the deploy.resources.reservations.devices specification. This approach is completely portable, supports resource pinning, and replaces deprecated runtime: nvidia parameters:
services:
  jellyfin:
    image: jellyfin/jellyfin:latest
    container_name: jellyfin
    restart: unless-stopped
    user: "1000:1000"
    environment:
      - JELLYFIN_PublishedServerUrl=https://media.yourdomain.com
      - NVIDIA_VISIBLE_DEVICES=all
      - NVIDIA_DRIVER_CAPABILITIES=all
    volumes:
      - ./config:/config
      - ./cache:/cache
      - /mnt/storage/media:/media:ro
    deploy:
      resources:
        reservations:
          devices:
            - driver: nvidia
              count: all
              capabilities: [gpu, video, compute, utility]
    networks:
      - media-network
    security_opt:
      - no-new-privileges:true

  caddy:
    image: caddy:2.8-alpine
    container_name: jellyfin-caddy
    restart: unless-stopped
    ports:
      - "80:80"
      - "443:443"
    environment:
      - DOMAIN_NAME=media.yourdomain.com
    volumes:
      - ./Caddyfile:/etc/caddy/Caddyfile:ro
      - ./caddy_data:/data
      - ./caddy_config:/config
    networks:
      - media-network
    depends_on:
      - jellyfin

networks:
  media-network:
    name: jellyfin-media-network
    driver: bridge
Key configuration choices in this Compose setup:
capabilities: [gpu, video, compute, utility]: Crucial parameter. Passing onlygpuorvideois insufficient; Jellyfin requirescomputefor OpenCL/CUDA HDR Tone Mapping andutilityfornvidia-smitelemetry hooks.- Read-Only Media Volume (
:ro): Protects your video and audio library from accidental deletion or unintended file modifications by background server plugins. - Fast Cache Directory:
./cachestores temporary HLS video segments during transcoding. For heavy multi-user environments, mount this directory to an NVMe drive or a RAM-backedtmpfsvolume (e.g.tmpfs: /cache:size=8G) to reduce disk I/O wear.
Configuring the Edge Reverse Proxy (Caddyfile)
Create the /opt/jellyfin/Caddyfile. Media streaming requires handling WebSockets for sync-play functionality, buffering large header payloads, and ensuring chunked HTTP responses are not throttled:
media.yourdomain.com {
    encode gzip zstd

    header {
        Strict-Transport-Security "max-age=31536000; includeSubDomains; preload"
        X-Content-Type-Options "nosniff"
        X-Frame-Options "SAMEORIGIN"
        Referrer-Policy "strict-origin-when-cross-origin"
    }

    # Proxy all traffic to Jellyfin HTTP internal service
    reverse_proxy jellyfin:8096 {
        header_up Host {host}
        header_up X-Real-IP {remote_host}
        header_up X-Forwarded-For {remote_host}
        header_up X-Forwarded-Proto {scheme}

        # Enable buffer flushing for real-time video streaming
        flush_interval -1
    }
}
Deployment & Enabling NVENC in the Jellyfin Dashboard
Launch the stack using Docker Compose in detached mode:
docker compose up -d
docker compose ps
docker compose logs -f jellyfin
Once Caddy has generated your SSL certificate, open https://media.yourdomain.com in your browser and complete the initial setup wizard (create an admin account and add your media library paths under /media/movies and /media/tv).
To activate hardware transcoding in the Jellyfin web administration interface, perform the following exact configuration sequence:
- Navigate to Dashboard > Playback > Transcoding.
- Under Hardware acceleration, select NVIDIA NVENC from the dropdown list.
- In the Enable hardware decoding for checklist, check all codecs supported by your GPU architecture:
- H.264
- HEVC (H.265)
- HEVC 10bit
- VP9 & VP9 10bit
- AV1 (enabled if using RTX 3000 / 4000 series or newer)
- Check Enable hardware encoding.
- Under Hardware tone mapping, check Enable Tone Mapping and select NVENC Tone Mapping (uses OpenCL / CUDA).
- Set the Transcoding temporary path to
/cache. - Click Save at the bottom of the page.
Verifying Hardware Transcoding in Real Time
To verify that video transcoding is running entirely on the GPU and not on the CPU, start playing a high-bitrate 4K HEVC movie in a web browser (e.g., Chrome or Firefox). In the playback settings menu on the video player, manually lower the resolution to 1080p – 10 Mbps to force the server to transcode.
Open an SSH terminal on your host server and run:
watch -n 1 nvidia-smiExamine the output. You should observe:
- The
jellyfin-ffmpegprocess listed under the Processes table. - The Type column showing
C+G(Compute + Graphics). - Non-zero utilization in the Dec % (decoder) and Enc % (encoder) telemetry columns.
- Host CPU utilization remaining negligible (typically below 5%).
Production Hardening & Operational Best Practices
Implement these operational practices to maintain peak performance and service stability:
- Consumer GPU Transcode Limit Patch (nvidia-patch): Consumer-grade NVIDIA GeForce cards (such as GTX 1660, RTX 3060, RTX 4070) are artificially limited by NVIDIA driver firmware to 3–5 simultaneous NVENC encode sessions. For home servers with multiple users, apply the community-maintained nvidia-patch driver wrapper on your host OS to unlock unlimited concurrent encoding streams.
- Secure Remote Access: If sharing Jellyfin with family members outside your home network, place the service behind Cloudflare Tunnels or a private Tailscale mesh network. Note that Cloudflare Terms of Service restrict streaming large video files through standard free tunnels; using a direct VPS reverse proxy or Tailscale is recommended for heavy video streaming.
- Memory-Backed Transcode Cache: If your server possesses at least 32 GB of RAM, redirect the transcoding directory to a RAM disk by adding
tmpfs: /cache:size=10Gto the service definition. This eliminates SSD write amplification caused by constant temporary HLS chunk writes. - Automate Backups: The
/opt/jellyfin/configdirectory contains your watched history, user playlists, and custom library metadata. Automate daily off-site backups with Restic or BorgBackup.
Troubleshooting Common Deployment Issues
Below are three frequently encountered issues when configuring Jellyfin with NVIDIA GPU acceleration, along with their diagnostic solutions:
1. FFmpeg Crashes with “Playback Error: Client Not Compatible”
Symptom: Clicking Play immediately throws a fatal playback error, and FFmpeg.Transcode-*.log inside /opt/jellyfin/config/log/ shows Cannot load nvcuda.dll / libcuda.so.1 or Driver/library version mismatch.
Root Cause: The host NVIDIA driver was updated via apt upgrade in the background, but the kernel module has not reloaded (or the server requires a reboot). As a result, the Docker container’s runtime driver version mismatches the active host kernel module.
Resolution: Reboot the host server (sudo reboot) to ensure the newly compiled kernel drivers bind properly. Verify that nvidia-smi runs cleanly on the host before restarting the container stack.
2. Washed Out Colors During 4K HDR Transcoding
Symptom: Transcoding 4K HDR10 or Dolby Vision content down to 1080p produces a gray, washed-out image with dull colors on SDR screens.
Root Cause: Tone Mapping is disabled, or OpenCL/CUDA compute capabilities are missing from the container environment, causing FFmpeg to skip chromatic gamut compression from BT.2020 to BT.709.
Resolution: Ensure NVIDIA_DRIVER_CAPABILITIES=all or capabilities: [gpu, video, compute, utility] is declared in docker-compose.yml. In Jellyfin under Dashboard > Playback > Transcoding, check both Enable Tone Mapping and Vpp Tone Mapping.
3. Permission Denied on /cache Directory
Symptom: Video starts buffering for 10 seconds and stops completely. Jellyfin logs display Error: Access to the path '/cache/transcodes' is denied.
Root Cause: The host directory /opt/jellyfin/cache was created by root, while the container runs with user ID 1000:1000.
Resolution: Fix file ownership on the host filesystem:
sudo chown -R 1000:1000 /opt/jellyfin/cache
sudo chmod -R 775 /opt/jellyfin/cache
docker compose restart jellyfin
Summary & Key Takeaways
By pairing Jellyfin with Docker Compose and the NVIDIA Container Toolkit, you transform an ordinary homelab server into a high-performance, enterprise-grade personal streaming powerhouse. Offloading intensive 4K HEVC decoding, HDR-to-SDR tone mapping, and real-time H.264 encoding to dedicated GPU silicon preserves your CPU compute for other critical homelab workloads. With complete privacy, zero subscription fees, and automated Let’s Encrypt TLS reverse proxying through Caddy, your media library remains fully under your sovereign control.

Hi, I’m Mark, the author of Clever IT Solutions: Mastering Technology for Success. I am passionate about empowering individuals to navigate the ever-changing world of information technology. With years of experience in the industry, I have honed my skills and knowledge to share with you. At Clever IT Solutions, we are dedicated to teaching you how to tackle any IT challenge, helping you stay ahead in today’s digital world. From troubleshooting common issues to mastering complex technologies, I am here to guide you every step of the way. Join me on this journey as we unlock the secrets to IT success.