As development teams, homelab enthusiasts, and edge engineers outgrow standard Docker Compose architectures, Kubernetes naturally emerges as the next frontier for declarative orchestration. However, standard upstream Kubernetes (kubeadm) carries massive resource overhead and operational complexity that is ill-suited for single-node machines, edge gateways, or local test environments.
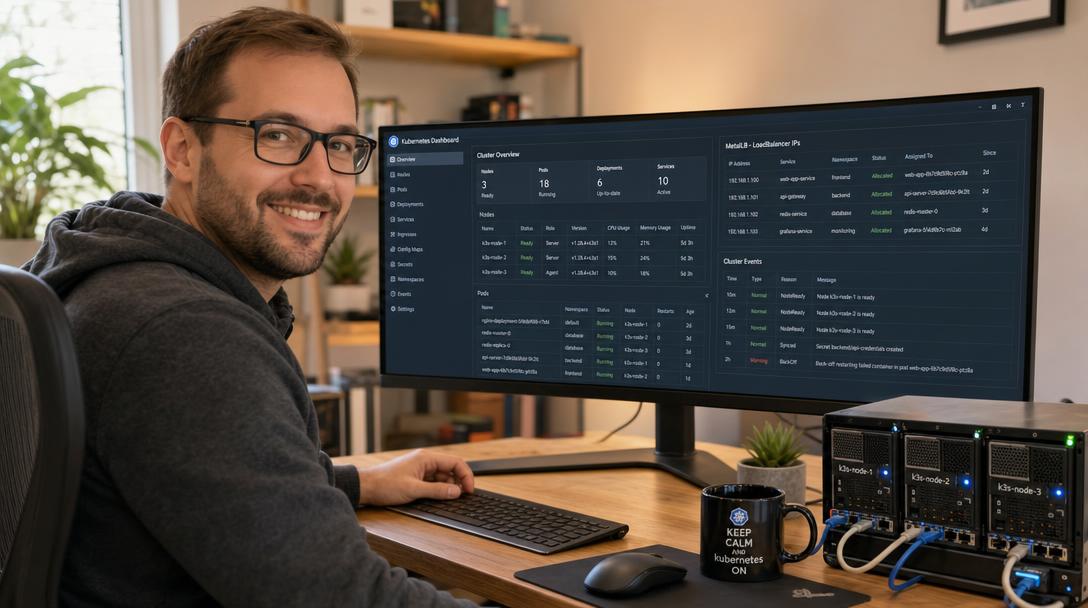
To solve this, Rancher developed K3s: a lightweight, fully compliant, CNCF-certified Kubernetes distribution packaged as a single binary with a memory footprint under 512 MB. Yet, engineers deploying K3s on bare-metal servers or local hypervisors immediately run into a notorious networking roadblock: how do you expose Kubernetes LoadBalancer services with real, dedicated IP addresses from your local network?
In managed cloud environments (like AWS EKS or GCP GKE), creating a type: LoadBalancer service automatically provisions a cloud load balancer. In bare-metal K3s, services remain stuck in <pending> status unless you use a dedicated bare-metal load balancer. While K3s bundles a rudimentary proxy named ServiceLB (Klipper-LB), it binds host ports directly and cannot assign clean, dedicated subnet IPs.
In this comprehensive tutorial, you will learn how to deploy a production-grade single-node K3s cluster on Ubuntu with ServiceLB disabled, followed by installing and configuring MetalLB in Layer 2 mode to hand out true static LAN IP addresses to your containerized workloads.
Why Replace K3s ServiceLB with MetalLB?
Understanding the architectural difference between K3s’s default load balancer and MetalLB is vital for clean network design:
- The Problem with ServiceLB (Klipper-LB): K3s’s built-in ServiceLB deploys daemonset pods that use
hostPortbindings. This means if you expose an Nginx service on port 80, it monopolizes port 80 across all node IP addresses. You cannot assign distinct, dedicated IP addresses (e.g.,192.168.1.200for your ingress and192.168.1.201for your monitoring stack). - The MetalLB Advantage: MetalLB acts as a genuine network load balancer. In Layer 2 mode, it monitors Kubernetes
LoadBalancerservices, allocates unused IPv4 addresses from a designated pool, and responds to ARP requests on your local network interface. Devices on your local network can reach your Kubernetes pods directly via dedicated LAN IPs without port collisions.
Technical Prerequisites
Before proceeding, ensure your environment meets the following requirements:
- Operating System: A fresh installation of Ubuntu 22.04 LTS or Ubuntu 24.04 LTS.
- Hardware Sizing: Minimum 2 vCPUs and 4 GB of RAM (8 GB+ recommended if deploying workloads like Ollama or local AI models).
- Network Planning: A contiguous block of unallocated static IPv4 addresses in your local subnet (outside your router’s DHCP scope). For example, if your home/office network is
192.168.1.0/24, reserve192.168.1.200-192.168.1.220.
Step 1: Preparing Ubuntu for K3s
Update your system packages and install essential network utilities:
sudo apt update && sudo apt upgrade -y
sudo apt install -y curl iptables software-properties-common
If you have UFW enabled, ensure that Kubernetes internal traffic and API server ports are open, or temporarily disable it for initial validation:
sudo ufw allow 6443/tcp # K3s API server
sudo ufw allow 80/tcp   # HTTP Ingress
sudo ufw allow 443/tcp  # HTTPS Ingress
sudo ufw reload
Step 2: Installing K3s Without Default ServiceLB
As documented in the Rancher K3s Official Documentation, you can disable bundled components using the --disable flag during installation. We will explicitly disable servicelb so that MetalLB can take full control of all LoadBalancer service requests.
Execute the official K3s installation script with the required flags:
curl -sfL https://get.k3s.io | INSTALL_K3S_EXEC="--disable servicelb --write-kubeconfig-mode 644" sh -Let’s dissect the installation parameters:
--disable servicelb: Prevents K3s from deploying Klipper-LB, avoiding ARP and IP allocation conflicts with MetalLB.--write-kubeconfig-mode 644: Allows non-root users on the host machine to read/etc/rancher/k3s/k3s.yaml, eliminating the constant need forsudo kubectl.
Verify that K3s is healthy and the control plane node is in Ready status:
kubectl get nodes -o wideStep 3: Installing MetalLB via Official Manifests
We will deploy MetalLB using its official, pre-validated Kubernetes manifests, following the MetalLB Official Layer 2 Documentation.
Apply the MetalLB release manifests:
kubectl apply -f https://raw.githubusercontent.com/metallb/metallb/v0.14.8/config/manifests/metallb-native.yamlMonitor the rollout until both the MetalLB controller deployment and the speaker daemonset pods reach Running status:
kubectl wait --namespace metallb-system \
                --for=condition=ready pod \
                --selector=app=metallb \
                --timeout=120s
Step 4: Configuring MetalLB IP Address Pools and Layer 2 Mode
Modern MetalLB (v0.13+) uses Custom Resource Definitions (CRDs) rather than legacy ConfigMaps. We must define two declarative resources:
- IPAddressPool: Specifies the range of IP addresses MetalLB is authorized to assign.
- L2Advertisement: Tells MetalLB to announce these IP addresses over Layer 2 (ARP) on the local network.
Create a configuration file named metallb-config.yaml. Replace 192.168.1.200-192.168.1.220 with your subnet’s unallocated range:
apiVersion: metallb.io/v1beta1
kind: IPAddressPool
metadata:
  name: local-lan-pool
  namespace: metallb-system
spec:
  addresses:
    - 192.168.1.200-192.168.1.220
---
apiVersion: metallb.io/v1beta1
kind: L2Advertisement
metadata:
  name: lan-advertisement
  namespace: metallb-system
spec:
  ipAddressPools:
    - local-lan-pool
Apply the configuration to your cluster:
kubectl apply -f metallb-config.yamlStep 5: Testing with a Sample LoadBalancer Service
To verify that MetalLB properly allocates IP addresses and responds to network traffic, deploy a lightweight Nginx web server deployment accompanied by a LoadBalancer service:
cat << 'EOF' | kubectl apply -f -
apiVersion: apps/v1
kind: Deployment
metadata:
  name: test-webserver
spec:
  replicas: 2
  selector:
    matchLabels:
      app: test-webserver
  template:
    metadata:
      labels:
        app: test-webserver
    spec:
      containers:
        - name: nginx
          image: nginx:alpine
          ports:
            - containerPort: 80
---
apiVersion: v1
kind: Service
metadata:
  name: test-webserver-lb
spec:
  type: LoadBalancer
  selector:
    app: test-webserver
  ports:
    - protocol: TCP
      port: 80
      targetPort: 80
EOF
Check the service status:
kubectl get svc test-webserver-lbWithin seconds, you will observe that EXTERNAL-IP is no longer stuck in <pending>, but has been assigned the first available IP from your pool:
NAME                  TYPE           CLUSTER-IP      EXTERNAL-IP     PORT(S)        AGE
test-webserver-lb     LoadBalancer   10.43.120.45    192.168.1.200   80:31250/TCP   15s
Now, test reachability from any computer or browser on your local network:
curl -I http://192.168.1.200You will receive an instant HTTP/1.1 200 OK response directly from the Nginx pod, proving that Layer 2 ARP resolution is functioning flawlessly.
Requesting Static Specific IP Addresses for Services
In many homelab setups, you want a specific service (such as a Pi-hole DNS server or a centralized Caddy reverse proxy gateway) to always receive the exact same IP address. You can enforce this by specifying spec.loadBalancerIP in your service definition:
spec:
  type: LoadBalancer
  loadBalancerIP: 192.168.1.215
  ports:
    - port: 80
Troubleshooting Common K3s & MetalLB Errors
1. Service Stuck in <pending>
- Cause: MetalLB pool exhausted or CRDs missing.
- Fix: Run
kubectl describe svc <service-name>. Look at the Events section. If it saysno allocated IP, check yourIPAddressPooldefinition and verify your pool range has available IPs.
2. IP Assigned but Cannot Ping or Connect
- Cause: Linux host firewall blocking forwarded traffic or ARP requests.
- Fix: Ensure bridge netfilter is enabled on the host:
sudo modprobe br_netfilter
echo 1 | sudo tee /proc/sys/net/bridge/bridge-nf-call-iptables
Conclusion
By pairing the lightweight resource efficiency of K3s with the robust Layer 2 ARP capabilities of MetalLB, you have turned a bare Ubuntu server into a production-ready Kubernetes environment. You can now deploy microservices, databases, and ingress controllers with real, predictable LAN IP addresses—combining enterprise cloud capabilities with complete local control.

Hi, I’m Mark, the author of Clever IT Solutions: Mastering Technology for Success. I am passionate about empowering individuals to navigate the ever-changing world of information technology. With years of experience in the industry, I have honed my skills and knowledge to share with you. At Clever IT Solutions, we are dedicated to teaching you how to tackle any IT challenge, helping you stay ahead in today’s digital world. From troubleshooting common issues to mastering complex technologies, I am here to guide you every step of the way. Join me on this journey as we unlock the secrets to IT success.